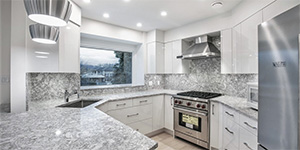
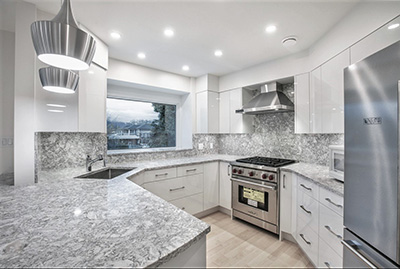
Checklist for Replacing Your Deck

If your house has a deck, you are probably aware of how important that outside space is for your enjoyment of your home. A deck is a wonderful place to spend a sunny day, or entertain friends and family on a warm evening. However, because your deck is outside, it gets exposed to much more wear and tear than the inside of your home. Poor weather, sunlight, and temperature changes all affect your deck and can cause it to look shabby, or even develop dangerous weaknesses. With that in mind, we’re going to look at three things:

  • Basic maintenance to keep your deck safe and looking good
  • How to know when you need to replace your deck
  • What you need to do to prepare for replacing your deck

Basic maintenance and inspections

Let’s begin with a thorough checklist for inspecting and maintaining your deck. This should be done seasonally, as changes in temperature and the daily weather will cause damage to your deck throughout the year. During your inspection, you are looking for a few key issues: corrosion, cracks, and rot.  These are all problems that lead to safety issues for your deck.

  • Corrosion can make metal pieces weak, and they might eventually fail. It can also be a sign too much water is getting into an area.
  • Cracks can form where wood or other materials are stressed over time; make sure to be especially thorough when you check stairs, railings, and structural beams. Cracks often start to form around nail or screw heads, or knots or other weak spots in the lumber.
  • Rot causes wood to get progressively weaker, until it is no longer able to stand up to stress. If you notice nails are coming loose and working themselves out of a piece of wood, inspect that piece for rot. If you can push a screwdriver with relative ease into any wood, especially if it will go in a centimeter or more, you should replace that piece of wood. Areas of high moisture, such as where posts are close to the ground, are at high risk of rot.

Before you start to make any repairs to your deck, follow this inspection checklist:

  1. Inspect the underside of your deck: Using a flashlight, look at the underside of the deck. Make sure to check the metal flashing that attaches your deck to your home. Look for signs of water damage where your deck connects to your house.
  2. Check the joists, posts and beams: After you check the underside, check the structural parts of your deck, especially the ones out of sight. Look for signs of rot on posts and joists and check all the hardware, making note of what’s seriously rusted and needs to be replaced. Most importantly, check the bottoms of the posts where they meet the ground, and make sure there is no sign of decay in the wood; this is an area where moisture from the ground can cause a lot of problems.
  3. Check the surface: Inspect for cracks, rotting deck boards or protruding nails. Walk around the surface of the deck to listen for squeaks. Feel for soft spots or sagging areas and make note of any cracks or loose nails that need repair.
  4. Inspect the railing and stairs: Make sure your railings are sturdy, with no loose posts or slats. Inspect any stairs leading to the deck to make sure there are no loose, damaged or rotting stairs that need to be replaced.
  5. Hot tubs/jacuzzis: If you have a hot tub/jacuzzi, make sure you have inspected its area of the deck very well, and that you are also inspecting and maintaining the hot tub regularly . A hot tub is heavy! It can be dangerous if the deck underneath it is damaged. Furthermore, a leaky hot tub can cause rot from water constantly seeping into the wood around it.

Once you’ve done your inspection, you’ll need to assess if you can do repairs and maintenance to your deck, or if there are any more serious problems that mean it needs to be replaced. If the deck is in good shape, you should do the following maintenance:

  1. Replace any rotten wood and corroded metal fixtures
  2. Fix loose nails and other fasteners
  3. Clean and stain your deck – power washing can remove dirt, mold and plant growth, and insects, and regularly staining and sealing the deck is the best way to protect wood from sun and moisture.
  4. Prepare for seasonal changes – for example, if you get snow in the winter, it’s a good idea to lay a tarp over the surface of your deck to protect it from standing moisture, and/or clear the deck regularly.

Planning to replace the deck

What if, during your inspection, you realize that your deck is starting to have too much wear and tear, and it needs to be replaced? Or alternatively, it’s no longer meeting your needs and you want to upgrade it? Replacing a deck is a relatively straightforward job, but it does count as construction on your home and there are rules and standards that need to be followed. We always advise hiring a qualified contractor to do big projects such as deck replacements, but this is also a common DIY project. However you choose to proceed, make sure you plan for the following:

  • Get a building permit: Decks fall under building codes and bylaws, and you need to get a permit for the work before you start. If you don’t, you might be forced to stop work and face fines.
  • Obey building codes: A qualified contractor will always stick to building codes when designing and building your deck. Be prepared to pay for a building inspector to come and check the deck when it is finished.
  • Use the right materials: Make sure all of the lumber, fasteners, stains, and other materials being used are designed for outside use, meaning they will resist corrosion and rot better.
  • Block off the deck access: once the old deck has been removed, there is a risk of people accidentally falling from the patio door. Make sure this door is locked and secured for safety.

A deck is a wonderful feature for a family home. With care, yours can have a long useful life. Or, you can replace it with the deck of your dreams!

How Much Does it Cost to Renovate a Whole House in Vancouver?

How much does it cost to renovate a whole house in Vancouver?

Are you thinking of selling your home, and you want to increase its value? Have you recently bought an older house that needs work? Have you been in your home for a long time, and want to update it? Do you have an investment property that you want to add value to? If you have said yes to any of these situations, you are probably thinking about renovating your house.

If you are hoping to renovate your home, it can be hard to know where to start when making plans. You are probably trying to get a rough idea of how much your renovation might cost, as a place to start. Unfortunately, it’s hard to really get a good idea of the expected costs without getting a quote from a general contractor. However, here we can discuss some general costs and ballpark numbers, so that you can have something to work with at this stage of planning. While renovating a whole house in Vancouver isn’t a cheap project, it will add value to your property, and make it more liveable for you as well. So, let’s look at some of the factors to consider.

All at once or room by room?

First of all, what is the scope of your project? Are you just interested in redoing a few rooms? Or, are you planning to make significant changes or even gut the whole house? If you are planning a lot of changes, there are pros and cons to doing the work room by room, or getting the whole house renovated at once.

Some of the advantages of doing renovations room-by-room are:

  • You can likely stay living in the house for much of the work
  • You can spread the upfront costs out over longer periods of time
  • You have time to make decisions on future projects and can see how the current project goes before taking the next step
  • You can more easily “DIY” some parts of the project without getting in the way of a contractor

Some disadvantages are:

  • Going room by room can stretch renovating over months or years. It can feel like you are renovating forever!
  • It’s likely your labour and materials costs will be at least somewhat higher than if you did everything at once
  • You won’t be able to make significant changes to layouts

Some advantages of renovating your whole house at once are:

  • You can completely rethink the layout of your house and make big changes
  • You may be able to save money on labour and materials by completing the whole project in one go
  • It will be done much faster over all

Some disadvantages are:

  • Your upfront costs will be much higher and you may have to borrow a lot more money
  • You will probably not be able to live in the house and will need to budget for other living arrangements
  • Very large renovation projects can take an emotional toll on a homeowner

If you have a large project in mind, it’s important to get quotes from several contractors to assess the expected costs for what you want to do. You can ask them to assess for “everything at once” or for the cost room by room.

House renovation costs in Vancouver

Now, as we said before, it’s hard to guess how much a home renovation project is going to cost. Especially in Vancouver, housing prices and values change quickly, and there can be a lot of competition for good contractors. Therefore, take the following information as a guideline only, to help you guess at costs.

Whole house renovations

Currently in BC, the average homeowner is spending $15-$60 per square foot on whole house renovations. However, this cost accounts for more low to midrange renovations, which generally means budget-friendly appliances and materials, and doesn’t include overhauls on more than a few rooms. People usually prioritize the kitchen and the bathrooms, and do more cosmetic work on the rest of the house, such as paint and flooring.

If you are hoping to gut your house down to the studs and do major renovations, include new roofing or exterior work, or use higher end materials and appliances, you are likely looking at a renovation that will cost you between $100,000 and $200,000 dollars. That can be an intimidating figure! However, if it adds significant value to your home, it can be worth it.

Also be aware that significant problems such as a damaged foundation, asbestos, or severe fire or flood damage will increase the costs of renovations greatly.

Finally, the amounts above assume that you are hiring a contractor to do your renovations. While you may be able to complete some renovations yourself, we strongly recommend hiring a qualified general contractor for your work. They will work faster than you and take care of details like ordering materials and getting permits, and they often can get materials at a better price. Furthermore, you will be confident that your work is up to code, and there will be a warranty on the work in case of problems down the road.

High value rooms

If you are planning on doing just parts of the work now, you may be curious about what the most expensive rooms are to renovate. Unsurprisingly, kitchens and bathrooms usually cost the most to renovate, but also will add a lot of value to your house if done well. In Vancouver, the housing market is very volatile, so having a modern, desirable home is a good idea. As a rough guess, experts suggest that you plan to invest 5-15% of your home’s value into your kitchen and bathroom renovations. Currently, houses in Vancouver are have extremely high property values, so this worth double checking with a contractor, but it’s also a very good idea to over-estimate your budget. You don’t want to be surprised by extra costs when you can’t afford it.

Renovations are rarely cheap and rarely easy. However, it’s worth it to live in a home that feels like it’s just right for you and your family, or to know that you are getting the best value for your investment. Take time to plan your projects, and take your questions to your local home renovation experts.

Home Renovation Checklist

Home Renovation Checklist

A home renovation is a big project, and sometimes the hardest part is knowing how to get started. Therefore, we’ve put together a home renovation checklist for you to follow as you plan your renovation. By following each step, you can be confident that you will not get too many surprises along the way.

Step one: Set your goals and your budget.

To begin, you should get an idea of what you want to get done and how much you want to spend. This is a time for a bit of research, to see what other people might be spending on a similar project, so you don’t end up with unrealistic expectations.

Ask yourself the following questions:

  • why do I want to do this renovation? (For example: I am trying to increase the value of my home; my bathroom needs new fixtures)
  • what problems need to be solved? (For example: the bathroom only has a shower and I want a tub)

Step two: Decide on your priorities.

In any renovation project, there are some things that MUST happen in order for the renovation to be successful, and there are other things that would be nice to have, but you can let them go if you run out of money or time. For this reason, an important part of your checklist is a list of the “musts” and the “maybes”. For example, in a bathroom renovation, you might decide that the top priority is to replace the shower and the toilet, while replacing the light fixtures can wait if some unexpected costs come up. 

Step three: Choose your contractor.

Next, you want to hire your renovation team. There are many good resources online to help you choose a general contractor, so we won’t go into it in too much detail here. However, this is a very important decision to make, so don’t be afraid to ask for quotes from several companies, and make sure the team you choose is qualified to do, or manage, ALL of the work you need done. 

Step four: Write up your contract.

Your contractor will be in charge of making the actual contract, but, since you are following a handy home renovation checklist, you know that you want the following things included in the contract:

  • a communication plan (how you will check in, and how frequently
  • budget and payment schedules, including a cushion for unexpected costs (ideally 10-20%)
  • details about permits, insurance, and what will happen if something goes wrong
  • a plan for the post-renovation inspection and adjustments (once you have lived in the space again, you may notice a needed change)
  • projected timeline – when you expect the renovation to start and end

Step five: prepare for the project start.

If you are renovating your home, you must take time to figure out how the renovation will impact your day-to-day life. For example, if your kitchen is being completely overhauled, you might decide to move out for a few weeks so that you don’t have to live without a kitchen! In a nutshell, prepare yourself for the disruption of the renovation and do some planning to make things go as smoothly as possible.

You did it! Once you work to the end of this list, you should be ready to start your renovation project. 

Tips for Choosing a Builder

Tips for choosing a builder

Tips for choosing a builder in Vancouver, BC

When you are planning a home improvement project, choosing your builder can be the most important choice you make. Therefore, you may be feeling some stress about this decision. What are the most important things to think about when hiring a builder? There are many different details that might affect your choice. Here are a few tips to help you make this decision easier.

  1. Start with a solid plan.

Even the best contractor can’t give you a good quote without details. If you want to get a good idea of what your project will really cost, don’t start to meet with builders until you have a plan for your project. This can include drawings and details that are important to you. Basically, the more information you can give to a builder, the more accurate the quote will be.

  1. Know if you need a generalist or a specialist

Depending on your project, you may want to hire a general contractor to plan and do all of the work, or you may just want to hire a specialist for a clear task. For example, if you just need a brick patio laid into the ground your yard, you may want to hire a mason instead of a general builder. Remember, though, that many general builders can do a wide range of tasks well. More importantly, they can also hire and manage those specialists for you, as part of their overall plan.

  1. Get a few quotes

Each different builder or contractor will have a different plan for your home renovation project. Therefore, getting more than one quote will let you choose the price and the plan that works best for you. You can also then ask questions about certain details of a plan, so that you understand it better or can help the builder understand your vision.

  1. Get everything in writing

Don’t start any work without a signed contract. Even if your project is small, you will prevent a lot of headaches by writing down, ahead of time, what to do if problems come up. It’s also a good idea to discuss how often you will be updated, who is responsible for permits, and to talk about and agree on insurance.

  1. Once you’ve chosen a builder, trust them!

You are choosing a contractor who you think will be able to manage and complete your project. So, don’t try to be too involved! It is the builder’s job to oversee the work and communicate to you about it. They can do their job better if you aren’t in the way. Sit back, relax, and trust in your good decisions.

Choosing the right builder is probably the most important part of your home renovation project. Indeed, it can make or break your project. However, it doesn’t have to be a hard or scary choice if you follow the tips above. With some planning and research, you shouldn’t have to worry about your projects success.

Emerging Home Design Trends

Emerging Home Design Trends

Emerging Home Design Trends

The way we use and live in our homes has changed dramatically in the past several years. Many of us have adapting to working from home part or all of the time, and have been spending a lot more time at home with our immediate family. Emerging trends in home design show that homeowners are prioritizing updates and designs that give us dedicated activity spaces in our homes, that make our homes seem bigger by blurring the boundary between inside and outside, and feel luxurious to live in. Here are some of the ways these trends are being implemented in design.

Activity Spaces

Rather than the ubiquitous “flex space”, homeowners are looking to carve out space for their work and their interests. Search trends show that people are interested in designating spaces in their homes not just for home offices, but for home bars and wine cellars, art studios, home theatres, and gyms. People in more modest spaces are still looking to “flex” their available space, by maximizing the ease and efficiency with which they can switch activities – such as with a combined home office and gym, or with a murphy bed that turns a study into a guest room.

Bringing the Outdoors In

Blurring the line between “inside” and “outside” space can make your home feel more spacious and invite in light and air. Many homeowners are now including in their kitchen renovation plans, options for large patio doors or fold-away windows to open up the whole kitchen and dining are into a large patio space. For homeowners will more restrictions on their renovations, it’s desirable to widen windows, brighten up indoor spaces, and bring in a feeling of greenery by adding lots of houseplants to the home, or even adding green-coloured décor.

Decorative Refresh

As we spend more time at home, homeowners are looking for quick, cost-effective ways to brighten up and refresh their living spaces. Search trends show a dramatic increase in interest in items like accent pillows, decorative rugs, display shelves, and couch and chair covers. Simply changing up accent items gives homeowners a way to dramatically change the look and feel of their living space without investing in major upgrades.

Luxury Materials

The desire to update our living spaces with simple accents, as well as more involved renovations, has shown a trend away from minimalism and towards sumptuous luxury materials and items. Fabrics like velvet and linen are popular choices for textiles. Warm-coloured metals, crystal and real wood are popular materials for furniture and objects of interest. Colours such as gold and rich jewel tones create glamorous palettes. The materials people are choosing for their homes are a feast for the senses.

Our homes have become central to our lives in every way, and home design trends show that people are looking to invest in making their homes functional, flexible, and comfortable in every way. Our relationship with our homes has likely shifted for the long term, if not permanently, and people are adapting to their new ways of life.

Basement Renovation Costs in Vancouver

Basement Renovation Costs in Vancouver

The costs of a basement renovation project can vary widely, depending on many factors. Are you freshening up a basement office, or planning to install a self-contained suite? How many square feet of space will you be renovating? What features will you need to install, and how much do you plan to alter the existing floor plan? Let’s look at some of the projects you may be considering and get a sense of how they might impact your budget.

Big Budget Renovations

When you are planning your basement renovation costs, some projects are going to cost a lot more than others, and it’s a good idea to get a rough sense of how much you will need to set aside for “big ticket” expenses before you decide on smaller details. This is especially important for large projects like building in a basement suite. The most expensive costs you are likely to face are:

  • Plumbing: Installing plumbing for a full basement suite can cost as little as $10,000 to over $35,000, depending on your needs and what plumbing features already exist in your basement.
  • Foundation repair: If your basement has a solid foundation in good repair, this may not even be a consideration for you. However, if your foundation is damaged or not sufficient for the project you are considering, you may be looking at expenses upwards of $25,000. This is an important item to get a proper assessment and quote on.
  • Waterproofing: basements sit below ground level, by definition, and waterproofing is essential if you don’t want to face serious issues with flooding or water damage in the future. Again, if the existing structure is waterproof you may spend very little, but fully waterproofing a basement unit can again set you back up to $25,000.

Mid-level Costs

Other aspects of your renovation project will still be a considerable portion of your budget, but will be less than those noted above and you will have more flexibility in contractors and final costs. Mid-level projects include:

  • Framing
  • Electrical work
  • Insulation and drywall
  • Ceiling and flooring finishing
  • Installing built-in appliances and fixtures
  • Finishing

It’s possible for any of these projects to come in under $5000 each including labour and materials costs, and often much lower, depending on the scope of the work you need to complete and the materials and provider you choose. However, don’t forget that you will get what you pay for, so choose a reputable, licensed, and well-insured contractor.

Finishing touches

After you put in the big work above, the final touches in a renovation are mostly aesthetic, and will involve painting, decorating and furnishing the space. This is entirely up to you and your remaining budget, and how much you want to DIY versus hiring professionals.

Ultimately, a full basement renovation to a built-in suite can cost upwards of $100,000 depending on the size of the space and the scope of the work. Smaller projects will have substantially smaller budgets. Again, consult a good, trustworthy general contractor or three and get fair quotes for the work you want to accomplish, so you can plan accordingly.

Home Improvement Ideas on a Budget

Home Improvement Ideas on a budget

Upgrading your home can be like a daunting and expensive project, but not every home improvement needs to break the bank. There are many ways that you improve the look and livability of your home on a very frugal budget. Let’s look at a few ideas for home improvements that you can do yourself, for just a few hundred dollars.

Improve the look:

Painting

Don’t underestimate the power of a fresh coat of paint. Even in a tidy home, over the years high-impact areas will get damaged and dirty. The materials to paint a whole room can cost well under $200 – the trick is to take your time and make sure you are following tips from professionals to make your paint job look like it was done by a pro.

Updating wood features

Many older houses feature beautiful wooden doors, cabinets, railings and other features. However, like with paint, stained wood will experience wear-and-tear and trends change around what colours and types of stains are considered contemporary. Refinishing wood is a relatively easy home improvement project that you can do yourself. However, if you want to keep it even simpler and more budget friendly, just replacing hardware like door knobs and cabinet pulls can give a surprising visual lift.

New window dressings

Window dressings, like curtains and blinds, can get damaged and dingy over the years, and tastes can change as well. Upgrading your window coverings is a budget-friendly home improvement that can have a lot of impact without much effort.

Improve livability:

Ceiling fans

While they may feel a bit retro, ceiling fans are making a comeback as homeowners realize that they actually help you save money! By circulating air, ceiling fans help equalize temperatures and reduce your cooling and heating expenses. And since they are installed in the same bracket as your existing ceiling light fixture, they are a suitable DIY project since you don’t need to add any wiring.

Cork flooring

Cold floors are miserable on the feet and rough on your heating bill. Modern cork flooring is an attractive and easy-to-install material that will provide excellent insulation as well as a comfortable, springy walking surface. Many manufacturers now make cork flooring that snaps together without glue or nails, and can even be installed as a floating floor over your existing flooring. It may set you back $6 to $8 per square foot, but you can save on labour by installing it yourself.

Programmable thermostats

Never nag your family about their heating habits again! Programmable thermostats can save you hundreds of dollars a year in heating bills. Many systems can now be controlled by apps too, meaning that you can actually track your energy use and adjust the temperature in your home remotely, such as turning up the heat an hour or two before you arrive home after a trip.

Once you have an idea of what your needs and priorities are, an important tip is to consider hiring a professional design team for the planning process.

Tips For Planning a Master Suite Addition

Tips for planning a master suite addition

Over the past few years, you may have found yourself spending a lot more time at home, and with a lot more of your family, than in years past. If this has caused you to start dreaming about a private hide-away in your own home, where you can relax and unwind, you may already be thinking about expanding your master bedroom into a master suite. A master suite can be a very enjoyable – and value-enhancing – addition to your home, so it’s worth your while to consider both how you will use the added space, and how it may be enjoyed by future owners.

A master suite generally refers to the largest, or master, bedroom of a home, that also has its own private contained bathroom. It can be this simple, or can include amenities like walk-in closets, a sitting room, a patio or veranda, or anything else your fancy and your budget can accommodate. If you are dreaming about or actively planning your master suite addition, here are some tips for where to begin.

  • Location

Here’s an exciting tip: your existing master bedroom doesn’t have to be the base of your master suite! You may prefer the view from another part of your house, or perhaps you plan to grow old in this home and want to relocate your bedroom from an upper story to the ground floor. Really switching up your floorplan might take extra planning and work, but if you are going through the expense and effort of adding an addition to your home, it’s worth choosing the ideal location for your needs.

  • Priorities

This question goes hand-in-hand with our first tip: your needs for your master suite will probably influence where you choose to build it. Decide what your priorities are. Some ideas might be: storage and closet space; a large, well-appointed bathroom; a private patio or sitting area; a secluded home office; accommodating your existing furniture; or space for the biggest, comfiest bed money can buy. What is important to you will influence how the master suite addition is designed.

  • Special Needs

Since this is your custom living area, you can and should accommodate any special needs you have. If you or your partner expect to need accessible living space as you age, you may want to add wider doors and lower counters now to save having to renovate again. If you are a light sleeper, you may want to include extra sound insulation, especially if you live in a noisy area. It is worth thinking about how you will use the space will change over the years, and plan for this now if possible.

  • Professionals

Once you have an idea of what your needs and priorities are, an important tip is to consider hiring a professional design team for the planning process. A designer can walk you through decisions about materials choices, how to integrate the new addition into the existing structure, how to lay out the space efficiently, and where you should splurge on luxury products or where you can save money. Furthermore, a reputable design will facilitate applying for permits and will make sure the structure complies with zoning laws; you don’t want to have your renovation halted half-way through because of an improperly zoned structure! Your team can also refer you to reputable contractors to manage the actual construction.

A master suite addition is an exciting project, and considering these tips will help you figure out where to begin.

Planning Outdoor Living Spaces

Planning Outdoor Living Spaces

When people are buying a home, it’s usually the house itself that they are focused on, and the quality of the outdoor space is lower on the priority level. However, well-planned outdoor living spaces add not only to the “curb appeal” of a home, but also genuinely increase the livable, enjoyable space you and your family have access to. Therefore, it’s a good idea to set aside the time and the budget to make your outdoor spaces enjoyable and useful.

What goes into planning outdoor living spaces? Realistically, it has a lot in common with planning decoration or renovations in your indoor spaces: you want to develop your vision, make a plan that accommodates your budget and goals for the space, and then work with qualified professionals as needed to make your plan a reality. Let’s break down the process of planning your outdoor living spaces into some concrete steps:

  • Develop your vision.

What do you want to be able to do outside your home, and what do you want it to feel like? If your hobby is vegetable gardening, it makes sense to prioritize a well-designed garden with the facilities needed to maintain it, such as irrigation or a gardening shed. However, if you are planning to entertain outside a lot or want room for kids to play, you may opt for a large patio area and a well-maintained lawn. Make sure you are thinking about what is realistic in the space you have, and also think about how they space will look from inside your house, when you are looking out the windows.

  • Prioritize – and talk to professionals.

What needs to be done first, and where are you going to put the larger part of your budget? If you want to put in an irrigation system or a fancy stone walkway, you will want to get several quotes from qualified professionals so you understand how this will affect your budget. It can be helpful to work with a designer who is experienced in planning outdoor living spaces, to work your vision into a realistic plan. A well-regarded professional designer will also be able to refer you to contractors for specific parts of the job.

  • Think about maintenance.

Once you have a vision and have started to develop your plan, take a step back and make sure you understand what the ongoing maintenance needs will be for your outdoor living space, and if you will be able to do this work yourself or if you will need to contract professionals – for example, to maintain a water feature. Don’t let an unplanned maintenance burden derail your enjoyment of your outdoor living space for years to come.

Planning an outdoor living space can be as simple as adding a few nice plants along a walkway, to as complex and costly as a major indoor renovation. Whether your budget is a few hundred or tens of thousands of dollars, taking time to plan and consult a few construction professionals will help assure that you end up with a space that you love, and love to live in, for years to come.

Choosing home renovation contractors in Vancouver

Choosing home renovation contractors in Vancouver

The home renovation and remodeling market in Vancouver is booking, and with the wide range of home renovation contractors and service providers offering services in and around our city, it can be overwhelming to know where to start! However, any home renovation project, small or large, benefits from experienced and professional help. When you are planning and budgeting for your project, it may be tempting to save money on your home renovation contractor, but you need to remember that you generally get what you pay for! So then, when you are trying to select a contractor in or around Vancouver for your renovation, how do you choose, and what should you look for? The following 12 tips may come in handy.

  • Know what you want to accomplish:

Many exciting projects get derailed when the homeowner doesn’t have a clear idea of their expectations around the remodel. To avoid unexpected delays and significant budget overruns, make sure you know what you want to accomplish, and that you and your contractor agree on the vision and scope of the project. 

  • Expand your network

We often reach out to family and friends for referrals to contractors, but your best references might be just down the street. If you see your neighbours getting work done on their homes, or you notice a feature you are interested in it might be worth your time to check in with them. Most homeowners are happy to talk about and even show you the renovations and upgrades they have done to their homes, especially if they are pleased with the outcome.

  • Don’t rush!

Remodeling your home is a significant investment of your money and time, and the outcome of the renovation will have lasting impacts on both the value of your home and your enjoyment of it. When we are excited about a project, it is tempting to just “get it done”, but it is better to wait for all the pieces to fall into place if you want the best chance of a satisfactory outcome. If your preferred home renovation contractor has a waitlist of several weeks or months before they can start your project, it is likely worth it to wait – they are likely in high demand for good reason.

  • There is no “right number” of quotes

“Common sense” advise tells us to get three quotes for a project before chosing a contractor. However, this isn’t a rule – get as many quotes as you want and need to feel satified that you have made the right choice  in your home renovation contractor. Conversely, you might meet one company and know that you have found a good fit. This isn’t necessarily a problem! It’s important to feel like you can…

  • Trust your gut

Home renovations aren’t always straighforward, and you and your contractor should both be willing and able to plan for what might go wrong. It’s a good idea to assess your rapport and trust with the contractor you will be working with – if something DOES go wrong in the process, do you feel confident you will be able to generate a solution together?

The home renovation market in Vancouver is competitive and it can be a real challenge to choose your contractor. At the end of the day, you are making a significant investment in your home and you should feel confident that your service provider is ready to do the work you want, and also be prepared to problem solve with you if issues arrive during the job. Hopefully these tips can help make choosing your contractor a little bit easier.