One of the first questions homeowners ask when planning a renovation is:
“How long will my renovation take?”
The answer depends on many factors, including the size of the project, the complexity of the design, availability of materials, permit requirements, and the contractor managing the work.
A small bathroom update may take only a few weeks, while a complete home renovation can take several months or longer.
Understanding the typical renovation timeline can help you plan your budget, prepare your home, and set realistic expectations before construction begins.
Average Home Renovation Timelines
Every renovation project is unique, but here are typical timelines for common residential renovation projects:
Renovation Project
Average Timeline
Bathroom renovation
4-8 weeks
Kitchen renovation
8-16 weeks
Basement renovation
8-20 weeks
Home addition
4-9 months
Full home renovation
6-12+ months
These timelines typically include construction time only. The design, planning, material selection, and permit process can add additional weeks or months before work begins.
Factors That Affect How Long a Renovation Takes
1. Project Size and Scope
The biggest factor affecting your renovation timeline is the size of the project.
A simple cosmetic update, such as replacing flooring, painting, or installing new fixtures, can often be completed quickly.
However, projects involving structural changes, plumbing, electrical upgrades, or major layout changes require significantly more time.
For example:
Cosmetic renovation:
Painting
Flooring replacement
Cabinet refinishing
Fixture upgrades
Typical timeline: 2–6 weeks
Major renovation:
Removing walls
Moving plumbing
Electrical upgrades
New kitchen layout
Structural modifications
Typical timeline: 3–12+ months
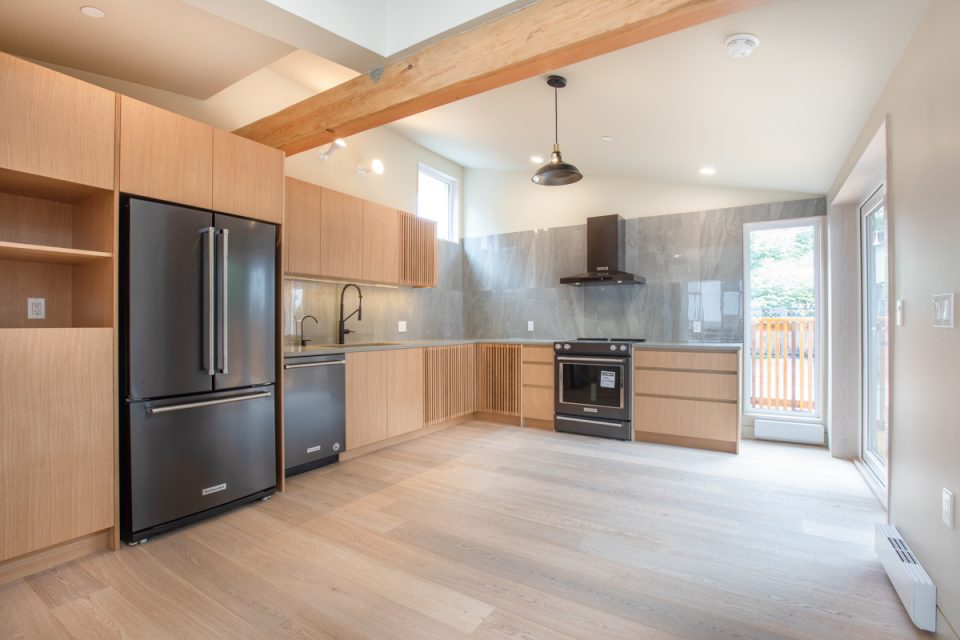
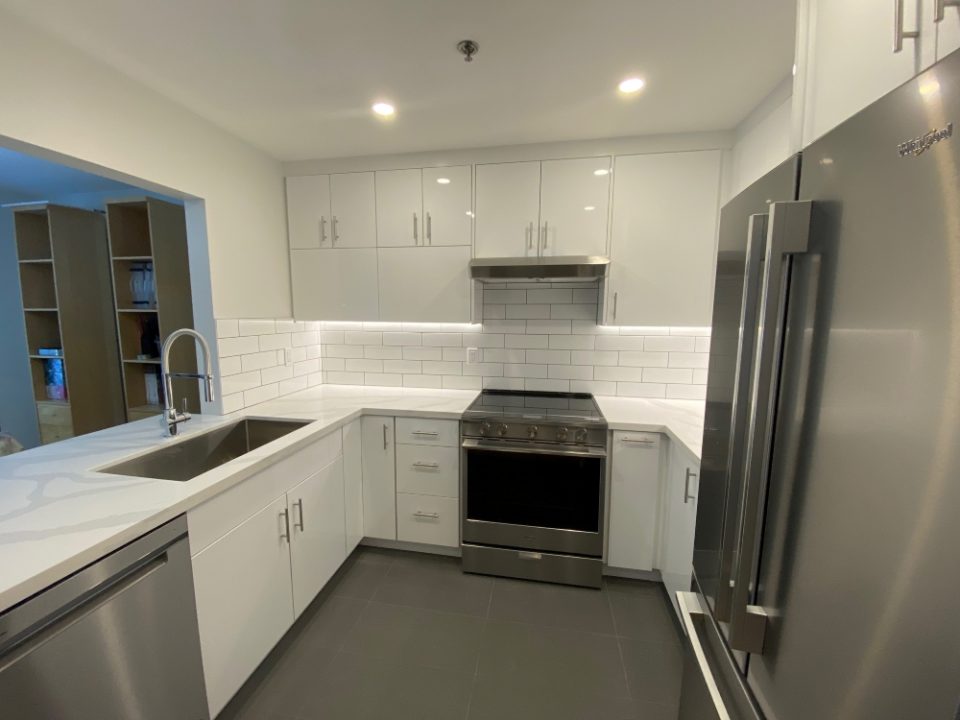
How Long Does a Kitchen Renovation Take?
Kitchen renovations are among the most popular home improvement projects, but they can also be one of the most complex.
A typical kitchen renovation takes:
8–16 weeks
The timeline may include:
Design and Planning (2-8 weeks)
Before construction begins, homeowners need to finalize:
Kitchen layout
Cabinet design
Countertop selection
Flooring
Appliances
Lighting
Finishes
Good planning helps prevent delays later.
Demolition (1-2 weeks)
This includes:
Removing old cabinets
Removing countertops
Taking out flooring
Preparing the space for construction
Installation (6-12 weeks)
This phase may include:
Electrical work
Plumbing adjustments
Cabinet installation
Countertop installation
Flooring
Backsplash
Painting
Final finishing work
A custom kitchen with high-end materials may take longer.
The timeline depends on whether you are updating finishes or completely rebuilding the space.
A typical bathroom renovation includes:
Demolition
Waterproofing
Plumbing work
Electrical upgrades
Shower or bathtub installation
Vanity installation
Tile installation
Painting
Final fixtures
A simple bathroom refresh may be completed faster, while a luxury bathroom renovation with custom tile work and layout changes may take several months.
Basement projects often involve more preparation because contractors may need to address:
Moisture issues
Insulation
Framing
Electrical
Plumbing
HVAC
Flooring
Drywall
If you are creating a legal basement suite, additional time may be required for permits, inspections, and code requirements.
How Long Does a Full Home Renovation Take?
A whole-home renovation is one of the most involved projects a homeowner can undertake.
Typical timeline:
6-12+ months
A full renovation may include:
Kitchen remodeling
Bathroom upgrades
Flooring replacement
Electrical updates
Plumbing improvements
Interior redesign
Structural changes
New finishes throughout the home
Older homes often require additional work once walls and floors are opened, which can extend the timeline.
The Renovation Planning Process
Many homeowners underestimate the time required before construction begins.
A successful renovation typically includes several stages:
1. Initial Consultation
Your contractor will review:
Your goals
Budget
Timeline expectations
Design ideas
Existing home conditions
2. Design and Planning
This stage includes:
Creating plans
Selecting materials
Finalizing layouts
Getting estimates
Depending on the complexity, this can take several weeks.
3. Permits and Approvals
In Vancouver and surrounding areas, many renovations require permits, especially when changing:
Plumbing
Electrical systems
Structural components
Room layouts
Permit timelines vary depending on the project.
4. Construction
Once planning is complete, construction can begin.
Having a detailed schedule helps coordinate:
Trades
Material deliveries
Inspections
Final finishing work
Common Reasons Renovations Take Longer Than Expected
Even well-planned projects can experience delays.
Common causes include:
Material Availability
Special-order items such as:
Custom cabinets
Windows
Flooring
Specialty fixtures
may have longer lead times.
Unexpected Issues
Once walls are opened, contractors may discover:
Old wiring
Plumbing problems
Water damage
Structural concerns
Hidden repairs
Design Changes
Changing decisions during construction is one of the most common reasons renovations fall behind schedule.
Examples:
Changing cabinet designs
Selecting different flooring
Modifying layouts
Adding new features
Finalizing decisions early helps keep the project on track.
Permit Delays
Permits and inspections are necessary for many renovations and can affect scheduling.
How to Keep Your Renovation on Schedule
While some delays are unavoidable, homeowners can help keep projects moving by:
1. Plan Before Construction Starts
Finalize:
Design choices
Materials
Fixtures
Finishes
before work begins.
2. Choose an Experienced Renovation Contractor
A professional contractor will help coordinate:
Trades
Materials
Scheduling
Inspections
This reduces delays and improves project efficiency.
3. Communicate Regularly
Regular updates between homeowners and contractors help identify issues early and keep everyone aligned.
4. Build a Realistic Timeline
A quality renovation takes time. Rushing construction can lead to:
Poor workmanship
Mistakes
Costly repairs
Should You Move Out During a Renovation?
Whether you should stay in your home depends on the project.
You may be able to stay during:
Small bathroom renovations
Cosmetic updates
Single-room projects
Moving out may be easier during:
Full home renovations
Major kitchen renovations
Projects involving plumbing or electrical shutdowns
Consider:
Noise
Dust
Access to bathrooms and kitchen
Safety
So, how long does a home renovation take?
The timeline depends on the size and complexity of your project:
Bathroom renovation: 4-8 weeks
Kitchen renovation: 8-16 weeks
Basement renovation: 8-20 weeks
Full home renovation: 6-12+ months
The key to a successful renovation is proper planning, realistic expectations, and working with an experienced renovation contractor.
At Canadoo, we help homeowners throughout Vancouver transform their homes through thoughtful design, quality craftsmanship, and professionally managed renovation projects. From kitchens and bathrooms to complete home renovations, our team can guide you through every stage of the process.
Contact Canadoo today to discuss your renovation project and create a timeline that works for your home.
One of the first questions Vancouver business owners ask when planning a renovation is: “How long will the project take?”
Whether you’re renovating an office, retail store, restaurant, medical clinic, or commercial space, understanding the timeline is essential for planning operations, minimizing disruptions, and setting realistic expectations.
The truth is that every commercial renovation is different. A simple office refresh may take a few weeks, while a complete tenant improvement or restaurant build-out can take several months. Factors such as permitting, project scope, building requirements, and material availability all influence the schedule.
In this guide, we’ll explain what affects commercial renovation timelines in Vancouver and what business owners can expect at each stage of the process.
Average Commercial Renovation Timelines
While every project is unique, the following timeframes can serve as general guidelines:
Project Type
Typical Timeline
Office Refresh (Paint, Flooring, Finishes)
2–6 Weeks
Small Retail Renovation
4–8 Weeks
Office Renovation
6–12 Weeks
Tenant Improvement Project
8–16 Weeks
Restaurant Renovation
10–20 Weeks
Medical or Specialized Commercial Space
12–24 Weeks
These timelines typically begin after planning and permitting have been completed.
The Commercial Renovation Process
Phase 1: Planning and Design
Estimated Timeline: 2-6 Weeks
Before construction begins, business owners need to define project goals, establish a budget, and finalize design requirements.
During this phase, your contractor may assist with:
Space planning
Interior design
Construction drawings
Material selections
Budget development
Project scheduling
The more decisions that are finalized upfront, the smoother the construction phase will be.
Phase 2: Permits and Approvals
Estimated Timeline: 2-12+ Weeks
Permitting is often one of the biggest variables affecting project timelines in Vancouver.
Depending on the scope of work, approvals may be required for:
Building permits
Electrical permits
Plumbing permits
Mechanical permits
Health authority approvals
Fire and life safety reviews
Tenant improvements and restaurant renovations often require additional reviews, which can extend approval timelines.
Starting permit applications early can significantly reduce delays later in the project.
Phase 3: Demolition and Site Preparation
Estimated Timeline: 1-2 Weeks
Once permits are approved, construction can begin.
This stage may include:
Removal of existing finishes
Demolition of walls
Disposal of materials
Preparation for new construction
The duration depends on the size and complexity of the space.
Phase 4: Construction
Estimated Timeline: 4-16+ Weeks
Construction is usually the longest phase of a commercial renovation.
Work may include:
Framing
Electrical upgrades
Plumbing modifications
HVAC installation
Drywall
Flooring
Painting
Millwork
Lighting installation
Projects involving structural modifications generally require additional time compared to cosmetic renovations.
Phase 5: Final Inspections and Occupancy
Estimated Timeline: 1-3 Weeks
Before reopening or occupying the space, final inspections may be required.
This stage can include:
Building inspections
Fire inspections
Deficiency corrections
Final cleaning
Occupancy approval
Proper planning helps ensure this phase proceeds smoothly and without unexpected delays.
Factors That Can Affect Your Timeline
Scope of Work
A simple office renovation may be completed in a matter of weeks, while a complete commercial build-out may take several months.
The larger and more complex the project, the longer the timeline.
Building Restrictions
Many commercial buildings have strict requirements regarding:
Construction hours
Elevator access
Noise restrictions
Material deliveries
These restrictions can impact scheduling and productivity.
Material Availability
Custom materials, specialty finishes, and imported products may have longer lead times.
Ordering materials early helps avoid unnecessary delays.
Permit Processing Times
Municipal approval timelines can vary depending on project complexity and city workloads.
This is particularly important for restaurants, medical offices, and projects involving significant mechanical or plumbing work.
Unexpected Conditions
Occasionally, contractors uncover hidden issues such as:
Water damage
Structural deficiencies
Electrical code concerns
Plumbing problems
Addressing these issues is important for safety and compliance but can extend the project schedule.
Can a Business Stay Open During Renovations?
In many cases, yes.
Experienced commercial contractors can often phase construction work to minimize disruptions and allow businesses to continue operating.
Strategies may include:
Working during evenings or weekends
Renovating in stages
Isolating construction zones
Scheduling high-impact work outside business hours
This approach is particularly common for offices, retail stores, clinics, and service-based businesses.
How to Keep Your Renovation on Schedule
Business owners can help reduce delays by:
Defining project goals early
Approving designs promptly
Selecting materials before construction begins
Working with experienced commercial renovation professionals
Maintaining clear communication throughout the project
Good planning is often the difference between a smooth renovation and a stressful one.
Choose an Experienced Commercial Renovation Partner
Commercial renovations involve more than construction. They require careful planning, scheduling, coordination, and problem-solving to keep projects moving efficiently.
At Canadoo, we help Vancouver business owners transform offices, retail stores, restaurants, clinics, and commercial spaces while minimizing disruption to day-to-day operations.
Our team manages every stage of the renovation process-from planning and permitting to construction and final completion-so you can focus on running your business.
Ready to Renovate Your Commercial Space?
Whether you’re planning a tenant improvement, office renovation, retail upgrade, or complete commercial transformation, Canadoo can help bring your vision to life.
Contact our team today to discuss your project and receive a customized renovation plan tailored to your business goals.
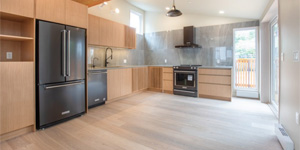
A kitchen renovation is one of the best investments you can make in your home. A well-designed kitchen improves functionality, increases property value, and creates a more enjoyable living space for your family. However, without proper planning, kitchen renovations can quickly become stressful and expensive.
At Canadoo Enterprises, we’ve been helping homeowners across Burnaby and the Lower Mainland with professional home renovations, kitchen renovations, and basement renovationssince 1995. Here are the most common kitchen renovation mistakes homeowners should avoid.
1. Starting Without a Clear Budget
One of the biggest renovation mistakes is beginning a project without a realistic budget.
Many homeowners focus only on cabinets and countertops while forgetting about:
plumbing upgrades
electrical work
permits
labour costs
flooring
lighting
unexpected repairs
A detailed renovation budget helps prevent surprises and keeps the project on track.
Tip:
Always include a contingency budget of 10-20% for unexpected costs.
2. Choosing Style Over Function
A beautiful kitchen still needs to work efficiently for everyday life.
Common layout mistakes include:
poor appliance placement
limited counter space
lack of storage
awkward traffic flow
Your kitchen should match how your household actually cooks and lives.
Tip:
Prioritize workflow and functionality before selecting finishes and décor.
3. Hiring the Cheapest Contractor
Choosing the lowest quote often leads to poor workmanship, delays, or additional repair costs later.
An experienced renovation company provides:
proper project planning
licensed trades
quality materials
professional installation
warranty protection
Tip:
Choose contractors based on experience, reputation, and communication-not just price.
4. Ignoring Storage Needs
Many homeowners underestimate how much kitchen storage they need.
Without smart storage solutions, kitchens quickly become cluttered.
Consider including:
deep drawers
pantry cabinets
pull-out organizers
corner storage systems
vertical storage
Tip:
Custom storage features improve both convenience and long-term home value.
5. Poor Lighting Design
Lighting is often overlooked during kitchen renovations.
A kitchen needs multiple lighting layers:
task lighting
ambient lighting
accent lighting
Poor lighting can make even expensive kitchens feel dark and impractical.
Tip:
Install under-cabinet lighting and ensure workspaces are well illuminated.
6. Following Trends Too Closely
Trendy kitchens can become outdated quickly.
While modern design features are great, overly trendy materials or colours may reduce long-term appeal.
Tip:
Choose timeless core elements and add trends through accessories or paint.
7. Forgetting About Ventilation
Proper kitchen ventilation is essential, especially in busy family homes.
Without good ventilation, kitchens can develop:
excess moisture
grease buildup
lingering odours
Tip:
Invest in a quality range hood with proper exterior venting.
8. Trying to DIY Complex Renovation Work
DIY projects can seem like a way to save money, but mistakes with electrical, plumbing, or structural work can become costly and unsafe.
Professional renovation contractors ensure work is completed correctly and according to BC building codes.
Tip:
Leave specialized work to experienced professionals.
9. Not Planning for Daily Life During Renovation
Kitchen renovations can disrupt your daily routine for several weeks.
Many homeowners forget to plan temporary solutions for:
cooking
dishes
food storage
family meals
Tip:
Set up a temporary kitchen area before construction begins.
10. Skipping Professional Design Guidance
A professional renovation team can help homeowners avoid costly layout and material mistakes before construction starts.
Professional planning improves:
space efficiency
material selection
budgeting
project timelines
overall design quality
Tip:
Working with experienced renovation professionals saves time, stress, and money in the long run.
Why Homeowners in Burnaby & the Lower Mainland Choose Canadoo Enterprises
Since 1995, Canadoo Enterprises has helped homeowners transform their properties with high-quality renovation services, including:
Kitchen renovations
Home renovations
Basement renovations
We proudly serve:
Burnaby
Vancouver
Coquitlam
Surrey
Richmond
Lower Mainland communities
Our team focuses on craftsmanship, communication, and creating spaces that homeowners love for years to come.
A kitchen renovation is a major investment, and avoiding common mistakes can make the entire process smoother and more successful.
By planning carefully, working with experienced professionals, and focusing on both functionality and design, homeowners can create kitchens that add comfort, value, and style to their homes.
If you’re planning a kitchen renovation in Burnaby or the Lower Mainland, Canadoo Enterprises is ready to help bring your vision to life.
If you’re considering adding rental income or extra living space to your property, one of the first questions you’ll run into is:
Is it cheaper to convert an existing basement-or build a brand-new secondary suite from scratch?
In markets like Vancouver, the Lower Mainland, and surrounding areas, this decision can significantly impact your budget, timeline, and long-term return on investment.
Let’s break it down clearly so you can make the right financial and practical choice.
Quick Answer: Basement Conversions Are Usually Cheaper
In most cases, converting an existing basement is significantly more affordable than building a new suite from scratch.
Typical cost ranges in BC:
Basement conversion: $80,000 – $200,000+
New secondary suite (addition or new structure): $180,000 – $350,000+
But cost is only part of the story-let’s look at why.
Option 1: Basement Suite Conversion (Lower Cost Option)
Converting an existing basement into a legal suite is the most common choice for homeowners.
Why it’s cheaper:
Existing foundation and structure already in place
Shared plumbing and electrical systems
No need for major exterior construction
Faster approval and build time in many cases
Typical work involved:
Framing and drywall
Electrical and plumbing upgrades
Soundproofing and fire separation
Installing kitchen and bathroom
Adding legal egress windows and separate entrance
Timeline:
6-12 weeks (depending on complexity and permits)
Hidden costs to watch:
Lowering basement floors for ceiling height compliance
Upgrading old plumbing/electrical systems
Moisture-proofing and insulation
City permit and inspection requirements
👉 In older homes across Vancouver and Burnaby, these hidden costs can add up quickly.
Option 2: Building a New Secondary Suite (Higher Cost, More Flexibility)
A new suite may involve building an addition, garage suite, laneway home, or full structural extension.
Why it costs more:
New foundation or structural framing required
Full plumbing, electrical, and HVAC systems
Exterior construction and roofing
Landscaping restoration after build
Higher permitting complexity
Common types:
Detached garden suite
Laneway house
Home addition suite
Above-garage suite
Timeline:
4-8+ months depending on scope and approvals
Benefits despite higher cost:
Full design flexibility
Higher rental income potential
Better long-term resale value
No compromise on layout or ceiling height
Basement vs New Suite: Cost Comparison
Factor
Basement Conversion
New Suite Build
Cost
Lower
Higher
Timeline
Faster
Longer
Permits
Moderate
Complex
Design Flexibility
Limited
High
ROI Potential
Strong
Very Strong
What Most Homeowners in BC Choose
In high-demand areas like Vancouver, Burnaby, and Richmond, most homeowners choose:
Basement conversions first
Because:
Lower upfront cost
Faster rental income
Easier approvals in many zones
New suites for long-term investment properties
Because:
Higher rental rates
Better layout and privacy
Strong resale advantage
ROI: Which One Makes More Money?
While basement suites are cheaper to build, new suites often generate higher rent due to:
Separate entrance + privacy
Better natural light
Modern layouts
However, basement suites often deliver:
Faster payback period
Lower financial risk
Strong demand in rental-heavy areas
Key Decision Factors You Should Consider
Before choosing, ask:
1. What condition is your basement in?
Ceiling height?
Moisture issues?
Structural limitations?
2. What does your city allow?
Zoning rules vary across municipalities in BC.
3. What is your budget?
Under $150K – Basement conversion
$200K+ – New suite becomes realistic
4. Where is your property located?
High-value rental areas like Vancouver may justify higher investment.
Common Mistakes Homeowners Make
Underestimating permit requirements
Ignoring ceiling height rules
Skipping proper soundproofing
Not planning for inspection delays
Choosing cheapest contractor instead of qualified one
These mistakes often turn “cheap conversions” into expensive rebuilds.
Final Verdict
✔ Basement conversion is cheaper and faster
✔ New suite costs more but offers greater flexibility and rental potential
There is no universal answer-the right choice depends on your property condition, budget, and long-term goals.
Need Expert Advice on Your Property?
At Canadoo Enterprises, we help homeowners across BC understand structural feasibility and renovation planning as part of full exterior and construction projects.
A complete cost guide for Vancouver homeowners planning a legal basement suite in 2026 – including permit steps, CMHC financing, and ROI.
Metro Vancouver’s rental vacancy rate sits at under 1%. The average basement suite in East Vancouver rents for $2,100 to $2,400 a month. And with the BC government’s push to legalize more housing units through Bill 44, the window to add a secondary suite – and start earning income from your existing home – has never been more wide open.
For many Vancouver homeowners, a secondary suite is the only renovation that can pay for itself. But before you start knocking down drywall, you need to know the real numbers: what it costs, what the permit process looks like, and how to avoid the mistakes that turn a $80,000 project into a $140,000 one.
This guide covers everything you need to know about secondary suite renovation costs in Vancouver in 2026.
What Is a Secondary Suite?
A secondary suite is a self-contained dwelling unit located within the principal structure of your home – think a basement apartment with its own kitchen, bathroom, living area, and separate entrance. It’s not a laneway house (which is a detached structure on your property) and it’s not an unauthorized “mortgage helper” tucked behind a curtain wall. A legal secondary suite meets the BC Building Code and has been permitted by your municipality.
Under the BC Building Code, a secondary suite cannot exceed 90 m² (about 968 sq ft), and it cannot take up more than 40% of the home’s total habitable floor space. It must be located within the principal dwelling – in most Vancouver homes, that means the basement.
Homeowners add secondary suites for three main reasons: rental income to offset the mortgage, multigenerational living (parents, adult children, in-laws), and resale value. In Metro Vancouver’s market, all three are compelling. But the ROI math only works if the suite is done legally – more on that later.
Secondary Suite Renovation Cost in Vancouver — The Short Answer
Here’s the honest range for a secondary suite renovation in Metro Vancouver in 2026:
High-end or full gut (low ceilings, underpinning required, older home)
$120,000
$200,000+
These figures assume a basement conversion of roughly 500 to 800 sq ft in Metro Vancouver. At the cost-per-square-foot level, a legal suite typically runs $100 to $250 per square foot – higher than a standard basement renovation because of the additional requirements for fire separation, a separate electrical subpanel, and code-compliant plumbing.
The single biggest cost variable is what’s already there. A Vancouver Special built in the 1970s with an 8-foot basement, a nearby plumbing stack, and a 200-amp panel is a very different project from a 1940s bungalow with a 6-foot crawl space and a 100-amp fuse box. Before you budget, you need to know which one you’re working with.
The 6 Biggest Cost Drivers
1. Ceiling Height and Underpinning
The BC Building Code requires a minimum ceiling height of 6’5″ over at least 80% of the suite’s habitable floor area and over all exit routes. If your basement falls short, you have two choices: underpin (lower the floor) or walk away from the project.
Underpinning involves excavating below the existing foundation footings to lower the basement floor, then reinforcing the footings to carry the new load. It’s structural work and it’s expensive:
Underpinning cost in Vancouver: typically $30,000 to $70,000 depending on the perimeter length, soil conditions, and access
Bench-footing (an alternative method for smaller depth increases): $15,000 to $35,000, but eats into the floor area
If your home was built before 1950, assume you’ll need underpinning until a structural engineer tells you otherwise. Post-1970 Vancouver Specials almost always have sufficient ceiling height – it’s one of the reasons they’re so commonly converted.
2. Plumbing
A secondary suite requires a full kitchen and bathroom where, in most cases, only rough plumbing exists or none at all. New drain lines, venting, supply lines, and possibly a sewage ejector pump (if the suite sits below the city sewer line) all add up:
New bathroom rough-in: $5,000 to $10,000
Kitchen plumbing addition: $3,000 to $8,000
Sewage ejector pump (if required): $3,000 to $6,000
All plumbing must be done by a licensed plumber who pulls a permit. Homeowner permits are not available for secondary suite work – this is non-negotiable.
3. Electrical
A legal secondary suite requires its own electrical subpanel, metered separately from the main unit. If your home has a 100-amp panel – common in homes built before 1980 – it will need to be upgraded before a subpanel can be added.
Panel upgrade (100A to 200A): $3,000 to $6,000
Suite subpanel and wiring: $6,000 to $12,000
Interconnected smoke and CO detector system: $1,000 to $2,500
The electrical work must be done by a licensed electrician and inspected before walls are closed. All bedrooms require arc-fault protection; bathrooms require ground-fault protection.
4. Fire Separation
This is the requirement most homeowners don’t anticipate. The BC Building Code mandates a 1-hour fire-rated assembly between the secondary suite and the main dwelling – typically two layers of 5/8″ Type X drywall on the ceiling of the suite and fire-rated partitions along any shared wall. Fire blocking must be installed at all penetrations (electrical, plumbing, HVAC).
This isn’t optional and it isn’t decorative. It’s inspected. Expect to budget $3,000 to $8,000 for fire separation materials and labour, depending on how much of the ceiling and wall area needs to be rebuilt.
5. Separate Entrance
Every legal suite needs a separate, direct entrance to the exterior – not a shared corridor or a door through the garage. If your home already has a side door or a walk-out rear, you may already be most of the way there. If not, a new entrance involves:
Structural framing for the door opening: $1,500 to $3,000
Exterior door, weatherproofing, and exterior steps: $2,000 to $5,000
Excavation for a below-grade entrance or window well stairwell: $5,000 to $15,000
For many older Vancouver homes with below-grade basements, a new side entrance through a window well is the most cost-effective path.
6. Finishes and Fit-Out
Once the structure, mechanical, and fire separation work is done, you still need a liveable suite: flooring, kitchen cabinetry and countertops, appliances, bathroom fixtures and tile, lighting, and paint.
Kitchen (cabinets, counters, appliances): $8,000 to $20,000
Bathroom (tile, vanity, fixtures): $5,000 to $12,000
Flooring (LVP or tile throughout): $3,000 to $7,000
Lighting, paint, trim: $2,000 to $5,000
One practical note: rental suites take more wear than owner-occupied spaces. Spend money on durability – LVP flooring over hardwood, quartz over laminate counters, solid-core doors. You’ll recoup it in lower maintenance costs and longer intervals between refreshes.
Vancouver Secondary Suite Permit Requirements
Here’s the section most homeowners skip – and the one that causes the most expensive problems. An unpermitted suite is not just illegal. It doesn’t add measurable value at resale. It creates gaps in your home insurance. And if the City of Vancouver discovers it, you’re looking at stop-work orders, fines, and potentially the cost of removing everything you’ve built.
Do it properly. The permit process is not as daunting as it sounds.
Step 1: Confirm Your Zoning
The City of Vancouver allows one secondary suite per single-family lot in RS (Residential) and RT (Residential Two-Family) zones – which covers the vast majority of detached and semi-detached homes in Vancouver. You can confirm your zoning using the City’s online property map at vancouver.ca, or by calling 3-1-1.
If your property is in Burnaby, Richmond, North Vancouver, or another Metro municipality, the rules are similar but not identical. Burnaby, for example, requires a minimum lot size of 4,000 sq ft for a suite. It’s worth a call to your local building department before you start.
Step 2: Get Your Drawings Done
You’ll need architectural drawings to apply for a building permit. These show the layout of the proposed suite, the fire separation details, the egress windows, the electrical panel location, and the entrance. A residential designer or architect typically charges $2,000 to $5,000 for secondary suite drawings in Vancouver.
The City requires that drawings demonstrate compliance with the BC Building Code before it will accept a permit application. Getting the drawings right the first time saves weeks of back-and-forth.
Step 3: Apply for Permits
A secondary suite requires three separate permits:
Development permit (zoning compliance): $300 to $600
Building permit (construction): $1,200 to $2,400 depending on project value
Electrical and plumbing permits (pulled by your licensed contractors): $400 to $800 combined
Total permit costs typically run $2,000 to $4,000, not including the drawings.
Permit approval currently takes three to six months in Vancouver. This is the most common cause of project delays – homeowners underestimate the approval timeline and then try to accelerate the construction phase, which leads to inspection failures. Start the permit process before you demo anything.
BC Building Code Requirements Checklist
Your suite must meet all of the following to pass inspection:
✓
Minimum 6’5″ ceiling height in habitable rooms
✓
Separate entrance to the exterior (not through shared space)
✓
Full kitchen (sink, stove, refrigerator) and bathroom
✓
1-hour fire-rated assembly between suite and main dwelling
✓
Egress window in each bedroom (minimum opening size per BC Building Code)
✓
Separate electrical subpanel, accessible from within the suite
✓
Interconnected smoke and CO detectors with the main unit
✓
Minimum 400 sq ft floor area, maximum 968 sq ft (40% of habitable space)
✓
Compliant plumbing with proper venting and drainage
CMHC Secondary Suite Loan and Other Financial Programs
Here’s something many Vancouver homeowners don’t know: the federal government offers a dedicated financing program for exactly this project. The CMHC Secondary Suite Loan provides up to $80,000 at a fixed 2% interest rate for owner-occupied homes adding a legal secondary suite.
To put that in perspective: in early 2026, most HELOCs are running at prime plus 0.5 to 1.0% – roughly 6.2 to 6.5%. The CMHC loan is more than three times cheaper. If your project costs $70,000 to $80,000, financing it through the CMHC loan rather than a HELOC saves you $10,000 to $15,000 in interest over a five-year payback period.
Eligibility requirements include:
Owner-occupied home
The suite must be a new legal unit (not legalizing an existing illegal suite – although a companion program may apply in that case)
Household income under the program threshold (confirm current limits at CMHC.ca)
The suite must comply with applicable zoning and building codes
The numbers in practice A $75,000 suite financed entirely through the CMHC Secondary Suite Loan at 2% costs approximately $650/month to repay over 10 years. A legal East Vancouver basement suite rents for $2,100 to $2,400/month. The suite pays off the loan in approximately three years – and then generates pure income.
Stacking Programs for Energy Upgrades
If your secondary suite project includes energy-efficiency upgrades – insulation, windows, a heat pump – you may be eligible to stack additional rebates and subsidized financing:
CleanBC Better Homes: up to $15,000 in rebates for heat pumps, insulation, and window upgrades
Canada Greener Homes Grant: up to $5,600 in grants plus a 0% loan for eligible upgrades
BC Hydro and FortisBC rebates: $500 to $3,000 depending on the equipment installed
Stacking these programs on a project that includes a heat pump and basement insulation upgrade can reduce your out-of-pocket cost by $20,000 to $35,000. The catch: you need an energy advisor assessment before and after work, and the upgrades must be done by registered contractors. Talk to your contractor about sequencing this properly.
What’s the Return on Investment?
The secondary suite is, by a significant margin, the highest-ROI renovation in Metro Vancouver. Here’s why the math works so well.
A legal basement suite in East Vancouver or Burnaby rents for $1,900 to $2,500 per month in 2026. Over 12 months, that’s $22,800 to $30,000 in gross rental income. Against a renovation cost of $80,000 to $120,000, the simple payback period is three to five years – after which the suite generates roughly $25,000 a year in income indefinitely.
From a resale perspective, Vancouver buyers and their agents understand rental income capitalization. A suite generating $2,200/month adds meaningful buying power for investors and moves your home out of the single-family buyer pool into the investor-plus-owner-occupier pool – dramatically expanding demand. Legal suites consistently outperform kitchen and bathroom renovations on ROI in Metro Vancouver real estate.
Important: the legal status is everything An unpermitted suite does not add measurable value at resale. Listing agents are required to disclose it as non-legal, which discounts its value. Buyers request it be legalized before closing or ask for a price reduction to cover the work. If you’re building a suite for ROI, the permit is not optional – it’s what makes the math work.
Is Your Home a Good Candidate? (Self-Assessment)
Before calling a contractor, run through this quick checklist. It will save you time and give you a realistic sense of which cost tier your project is likely to fall into.
Check
What to look for
Ceiling height
Measure the clear height in your basement. 6’6″ or more? You’re likely in good shape. Under 6′? Budget for underpinning or reconsider the project.
Basement type
A full-height Vancouver Special (1960s–80s) is the ideal starting point. A pre-1950 bungalow with a low crawl space may require significant underpinning to be viable.
Separate entrance
Is there a side yard, rear yard, or window well that could accommodate a door without major structural work? A direct exterior entrance is required.
Plumbing proximity
If your main floor bathroom is near the basement, adding kitchen and bath plumbing below is much more affordable – the drain stack is already close.
Electrical panel
Check whether you have a 100A or 200A service. A 100A panel will need to be upgraded before a subpanel can be added.
Zoning
Visit vancouver.ca and search your address to confirm RS or RT zoning. Most single-family lots in Vancouver qualify.
Why a Legal Suite Is the Only Suite Worth Building
Every year, Vancouver homeowners spend $40,000 to $80,000 on unpermitted basement suites – and then discover at sale time that their investment has created a liability rather than an asset.
The risks of an unpermitted suite are significant:
Insurance: Most home insurance policies exclude coverage for damages related to an illegal suite. A tenant fire or water damage event in an unpermitted unit can result in a denied claim.
Resale: Listing agents must disclose the suite as non-legal. Buyers typically request legalization before closing or deduct the estimated cost from their offer – often more than the legalization would have cost in the first place.
Municipal enforcement: The City of Vancouver has increased enforcement of secondary suite regulations. Stop-work orders, fines, and mandatory removal of non-compliant work are real outcomes.
Tenant issues: In a dispute, the BC Residential Tenancy Branch takes a dim view of landlords operating illegal suites. It can affect your standing in any dispute resolution.
If you already have an unpermitted suite, the good news is that legalization – upgrading an existing space to meet code – is usually less expensive than starting from scratch. A structural assessment and permit application can tell you exactly what needs to change.
How Canadoo Approaches Secondary Suite Renovations
Canadoo Enterprises has been renovating homes and commercial spaces in Vancouver and Burnaby since 1995. Secondary suite conversions are one of our most requested projects – and for good reason. When they’re done properly, they’re the best investment most Vancouver homeowners can make.
What we bring to a secondary suite project:
Site assessment: We evaluate ceiling height, plumbing proximity, electrical capacity, and entrance options before you commit to a budget
Permit coordination: Our team works with residential designers and the City of Vancouver to prepare and submit permit applications – we understand what reviewers look for and how to avoid the back-and-forth that adds months to approval timelines
Licensed trades: All plumbing and electrical work is done by our licensed trade partners who pull their own permits and manage their own inspections
Full construction management: From demo through to final inspection, one point of contact – no chasing subcontractors or co-ordinating schedules
Burnaby and Vancouver experience: We know both permit offices and both building departments, which matters when your home sits on the boundary or you’re navigating Metro-specific rules
We offer free secondary suite assessments for homeowners in Vancouver, Burnaby, and the Lower Mainland. A 30-minute walkthrough can tell you which cost tier your project falls into, whether underpinning is a likely requirement, and what the permit timeline looks like for your specific property.
Frequently Asked Questions
How much does it cost to build a secondary suite in Vancouver?
In 2026, most basement suite conversions in Metro Vancouver cost between $60,000 and $120,000. Projects requiring underpinning to raise ceiling height can reach $150,000 to $200,000 or more. The biggest variable is the existing condition of your basement – ceiling height, proximity of the plumbing stack, and the age of your electrical panel.
Do I need a permit for a secondary suite in Vancouver?
Yes. A development permit and building permit are required, along with separate electrical and plumbing permits pulled by your licensed contractors. Operating without permits creates insurance gaps, complicates resale, and exposes you to municipal fines.
What is the CMHC Secondary Suite Loan?
A federal loan program offering up to $80,000 at a fixed 2% interest rate for owner-occupied homes adding a new legal secondary suite. It is one of the most cost-effective renovation financing tools available in Canada, and significantly cheaper than a HELOC at current rates.
How long does it take to add a secondary suite in Vancouver?
Plan for six to twelve months total from initial design to move-in. The permit approval process alone takes three to six months in Vancouver. Construction and inspections typically take two to four months after permits are in hand.
Is a secondary suite worth it in Vancouver?
In most cases, yes – legal suites are the highest-ROI renovation in Metro Vancouver. A suite generating $2,200/month can pay back a $90,000 renovation in approximately three to four years. After that, it generates roughly $25,000 a year in rental income and expands your buyer pool at resale. The ROI depends entirely on the suite being legal and permitted.
Can I legalize an existing illegal suite?
In many cases, yes. Legalization involves bringing the existing space up to current BC Building Code requirements and obtaining the necessary permits. It’s typically less expensive than building from scratch because the basic structure is already in place. Contact us for a legalization assessment.
Ready to Turn Your Basement into a Mortgage Helper?
Canadoo Enterprises offers free secondary suite assessments for homeowners in Vancouver, Burnaby, and the Lower Mainland. A 30-minute walkthrough gives you a realistic budget range, a permit timeline, and a clear picture of what your suite will look like – before you spend a dollar.Call 604-687-6252 or visit canadoo.ca/contact-us to book your free assessment.
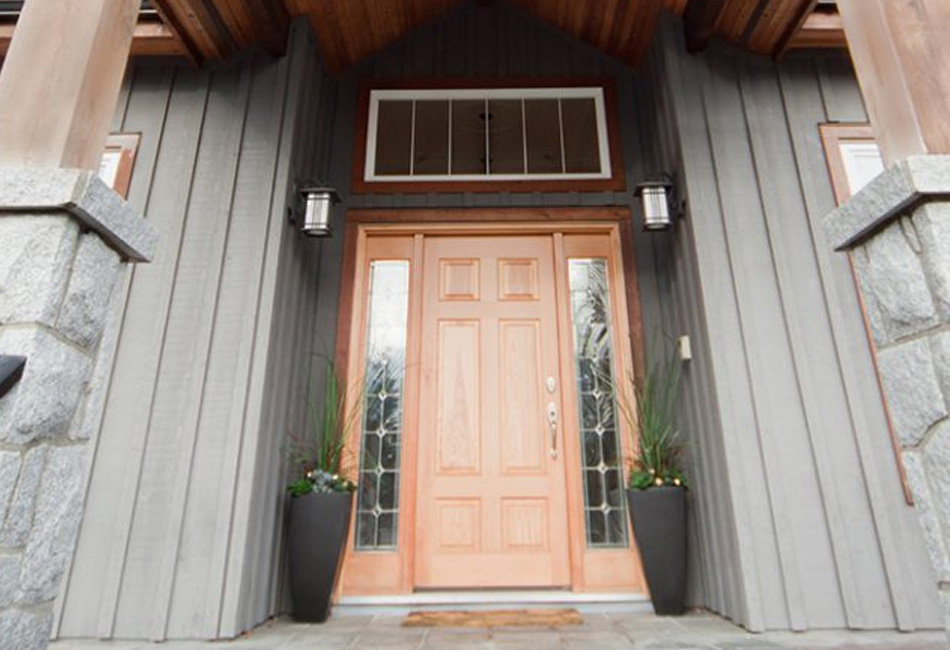
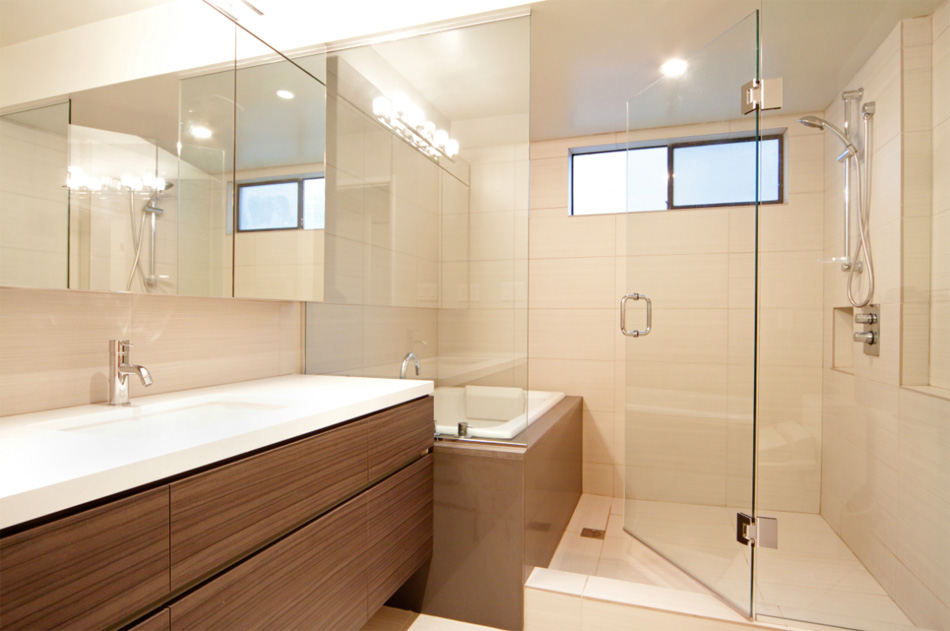
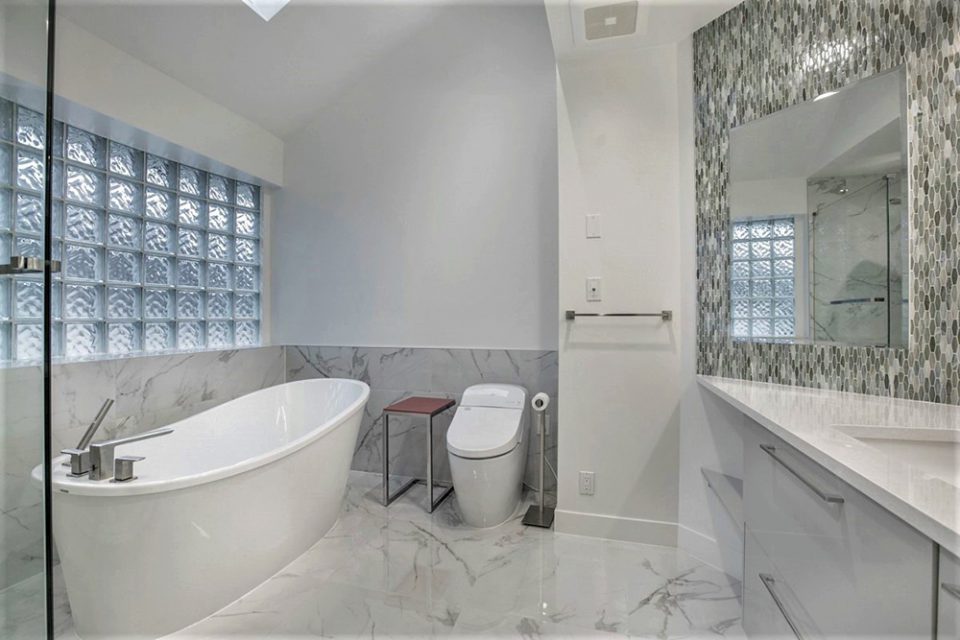
A beautiful, functional bathroom can make a huge difference in your home. Whether you’re in Vancouver, Burnaby, Richmond, or anywhere in the Lower Mainland, BC, a professional bathroom renovation can add value, comfort, and style to your property.
In this blog, we’ll explore key considerations for a successful bathroom renovation, highlight design trends, and explain why hiring an expert team is essential.
Why Renovate Your Bathroom?
Bathroom renovations aren’t just about aesthetics – they’re about improving functionality, efficiency, and home value.
Top Benefits:
Increased home value – A modern, updated bathroom can boost your property’s resale value.
Improved comfort & usability – Smart layouts, better lighting, and upgraded fixtures make daily routines easier.
Energy and water efficiency – Modern fixtures reduce water consumption and utility bills.
Personalized style – Create a bathroom that reflects your taste and lifestyle.
Key Bathroom Renovation Tips
1. Plan Your Layout Wisely
Consider traffic flow, accessibility, and storage needs. For small bathrooms, space-saving fixtures like wall-mounted vanities and sliding doors can make a big difference.
2. Choose Durable Materials
In Vancouver and the Lower Mainland, moisture and humidity are significant concerns. Choose water-resistant materials for floors, walls, and countertops, such as porcelain tiles, quartz, or treated wood.
3. Update Fixtures & Plumbing
Replacing outdated faucets, showerheads, and toilets not only improves style but also enhances water efficiency. Consider modern, low-flow options to save water and reduce bills.
4. Focus on Lighting & Ventilation
Proper lighting and ventilation are crucial to prevent mold and mildew. Combine ambient, task, and accent lighting for a balanced look, and ensure your bathroom has a good exhaust fan.
5. Add Storage Solutions
Maximize your bathroom space with clever storage:
Recessed shelves in showers
Floating vanities with drawers
Built-in cabinets for towels and toiletries
6. Hire a Professional Renovation Team
A professional bathroom renovation company can:
Ensure high-quality workmanship
Handle plumbing, electrical, and structural updates
Keep your renovation on budget and on schedule
Bathroom Renovations Across the Lower Mainland
We serve homeowners throughout Vancouver, Burnaby, Richmond, and surrounding areas. Our team specializes in:
Full bathroom remodels
Shower and tub upgrades
Vanity, lighting, and flooring installation
Custom designs tailored to your home and lifestyle
No matter the size or style of your project, we deliver beautiful, durable, and functional bathrooms.
Ready to Upgrade Your Bathroom?
Don’t settle for a bathroom that doesn’t meet your needs or style. Transform your space with a professional renovation team you can trust.
Planning a kitchen renovation in Vancouver? You’re making one of the smartest investments in your home. A well-executed kitchen remodel not only transforms your daily living experience but can recoup 75-90% of its cost when you sell your property. However, understanding the true costs involved is essential for creating a realistic budget and avoiding expensive surprises.
As Vancouver’s trusted renovation experts since 1995, Canadoo Enterprises has guided hundreds of homeowners through successful kitchen transformations. This comprehensive guide breaks down everything you need to know about kitchen renovation costs in Vancouver for 2026.
Quick Overview: What to Expect
Kitchen renovation costs in Vancouver vary significantly based on project scope, materials, and your home’s specific needs. Here’s what you can expect:
Budget-Friendly Refresh: $20,000 – $35,000
Mid-Range Renovation: $50,000 – $85,000
High-End Transformation: $75,000 – $150,000+
The average kitchen renovation in Vancouver currently sits around $55,000 to $70,000, though your specific project cost will depend on numerous factors we’ll explore below.
Breaking Down Kitchen Renovation Costs by Project Type
These ranges account for materials, labor, and basic permit costs but may not include structural changes or high-end custom features.
Detailed Cost Breakdown by Component
Understanding individual component costs helps you make informed decisions about where to invest your budget:
Cabinetry ($9,500 – $26,500)
Cabinets typically consume 30-40% of your total kitchen budget and have the biggest visual impact:
Stock cabinets (IKEA or similar): $3,000 – $8,000
Semi-custom cabinets: $12,000 – $20,000
Fully custom cabinets: $18,000 – $30,000+
Canadoo Tip: Quality cabinetry is worth the investment. We recommend focusing budget here rather than on trendy backsplash or hardware that’s easier to update later.
Countertops ($3,000 – $12,000)
Your choice of countertop material significantly impacts both cost and functionality:
Laminate: $1,500 – $3,500 (30-40 per sq ft installed)
Quartz: $4,500 – $9,000 ($90 – $170 per sq ft)
Granite: $4,000 – $8,500 ($80 – $150 per sq ft)
Marble: $6,000 – $12,000+ ($120 – $200 per sq ft)
Vancouver Climate Consideration: Quartz is our top recommendation for Vancouver kitchens. It’s durable, non-porous, low-maintenance, and handles our humid climate better than natural stone.
Appliances ($2,000 – $15,000+)
Appliance costs vary dramatically based on brand and features:
A typical mid-range appliance package includes a refrigerator ($1,500-$3,000), range/cooktop ($800-$2,500), dishwasher ($600-$1,200), and range hood ($400-$1,500).
Flooring ($2,000 – $8,000)
Kitchen flooring must withstand heavy traffic and moisture:
Vinyl plank: $2,000 – $4,000
Ceramic or porcelain tile: $3,000 – $6,000
Engineered hardwood: $4,000 – $7,000
Solid hardwood: $5,000 – $9,000+
Pro Tip: For Vancouver’s climate, we often recommend porcelain tile or engineered hardwood over solid hardwood, as they handle moisture fluctuations better.
Labor Costs ($15,000 – $45,000)
Professional labor ensures code compliance and quality workmanship:
Demolition: $1,000 – $3,000
Plumbing: $2,000 – $6,000
Electrical: $2,500 – $7,000
Cabinetry installation: $2,000 – $5,000
Countertop installation: $500 – $2,000
Tile/backsplash installation: $1,500 – $4,000
Project management and coordination: $3,000 – $8,000
Vancouver’s active housing market means labor rates average $80-$160 per hour, higher than many Canadian cities.
Lighting ($1,200 – $4,200)
Modern kitchen lighting includes multiple layers:
Recessed pot lights: $150 – $400 per fixture installed
Backsplash costs depend on material choice and installation complexity:
Ceramic tile: $25 – $45 per sq ft installed
Glass tile: $35 – $65 per sq ft installed
Natural stone: $40 – $80 per sq ft installed
Custom mosaic or designer tile: $60 – $150+ per sq ft installed
Vancouver-Specific Cost Factors
Several unique factors affect kitchen renovation costs in our city:
Permits and Inspections ($500 – $3,000)
The City of Vancouver requires permits for most kitchen renovations involving:
Moving or removing walls
Relocating sinks, stoves, or dishwashers
Electrical upgrades or panel replacements
Gas line modifications
Any structural changes
Basic kitchen renovation permits start around $500-$800, while comprehensive renovations requiring structural, electrical, and plumbing permits can reach $2,000-$3,000.
Energy Efficiency Requirements: For renovations valued over $20,000, Vancouver requires an EnerGuide evaluation and energy upgrade proposal, adding $500-$1,500 to your costs.
Condo and Strata Considerations ($300 – $1,500)
Vancouver’s high density means many kitchen renovations occur in condos:
Unexpected Issues in Older Homes ($2,000 – $20,000)
Vancouver’s heritage and character homes often reveal surprises:
Asbestos removal: $3,000 – $15,000
Mold remediation: $2,000 – $12,000
Electrical panel upgrades: $2,500 – $5,000
Plumbing system updates: $3,000 – $8,000
Structural repairs: $5,000 – $20,000+
Canadoo Recommendation: Budget 15-20% contingency for unexpected issues, especially in homes built before 1980.
Neighborhood Cost Variations
Kitchen renovation costs can vary by Vancouver neighborhood:
West Vancouver: $200 – $350 per sq ft (highest due to luxury expectations)
Kitsilano, Point Grey, Kerrisdale: $150 – $280 per sq ft (upper-mid to high-end)
Mount Pleasant, Commercial Drive: $130 – $220 per sq ft (mid-range)
Burnaby, New Westminster: $120 – $200 per sq ft (slightly lower than Vancouver core)
Condo kitchens (Downtown, Yaletown): $140 – $250 per sq ft (space constraints increase per-square-foot costs)
Money-Saving Strategies Without Sacrificing Quality
1. Maintain Your Existing Layout
Moving plumbing and electrical adds $5,000-$15,000 to your budget. If your current layout works reasonably well, keeping appliances and sinks in place saves substantially.
2. Reface Instead of Replace Cabinets
If your cabinet boxes are structurally sound, refacing costs $3,000-$8,000 versus $12,000-$25,000 for full replacement.
3. Choose Mid-Range Materials Strategically
Opt for quartz over marble (save $2,000-$4,000)
Select engineered hardwood over solid (save $1,500-$3,000)
Use ceramic tile instead of natural stone backsplash (save $800-$2,000)
4. Time Your Renovation Strategically
Winter renovations (November-February) can save 10-20% on labor costs as contractors have more availability.
5. Handle Prep and Finishing Work
If you’re handy, you can save $2,000-$5,000 by:
Doing your own demolition
Removing and disposing of old appliances
Painting walls yourself
Installing simple hardware
6. Shop Sales for Appliances and Fixtures
Major sales (Black Friday, Boxing Day, spring clearance) can save 20-40% on appliances and fixtures.
7. Use a Full-Service Renovation Company
Working with one company like Canadoo for design, project management, and execution often costs less than coordinating multiple contractors separately, while ensuring better quality control.
Return on Investment: Is It Worth It?
Kitchen renovations offer strong financial returns in Vancouver’s competitive real estate market:
Mid-range kitchen renovation: 75-90% ROI
High-end kitchen renovation: 65-75% ROI
Minor kitchen refresh: 80-95% ROI
Beyond resale value, consider these non-financial returns:
Improved daily functionality and family enjoyment
Reduced energy costs with efficient appliances
Increased home safety with updated electrical and plumbing
Enhanced entertaining and hosting capabilities
Personal satisfaction from a beautiful, customized space
Planning Your Kitchen Renovation Budget
Follow these steps for successful budget planning:
Step 1: Determine Your Total Budget
Include renovation costs plus 15-20% contingency for unexpected issues.
Step 2: Prioritize Your Goals
List must-haves versus nice-to-haves. Focus spending on elements that matter most to your daily use.
Step 3: Get Professional Input Early
Consult with experienced renovation contractors like Canadoo before finalizing plans. We can identify potential issues and cost-saving opportunities.
Step 4: Obtain Multiple Detailed Quotes
Get at least three quotes from licensed contractors. Compare scope of work carefully, not just bottom-line numbers.
Step 5: Review Financing Options
Consider:
Home equity line of credit (typically 5-7% interest)
Refinancing your mortgage
Personal savings
Home renovation loans
Step 6: Build in Contingency
Set aside 15-20% of your budget for unexpected discoveries, especially in older Vancouver homes.
Red Flags to Avoid
Protect yourself from cost overruns and poor quality:
Contractors without proper licensing (BC requires licensing for projects over $10,000)
Quotes significantly lower than others (typically indicates cut corners or hidden costs)
Pressure to start immediately without permits
Vague contracts without detailed specifications
No insurance or WorkSafeBC coverage
Unwillingness to provide references or portfolio
Timeline Expectations
Understanding realistic timelines helps with planning:
Planning and Design: 2-4 weeks
Developing design concepts
Selecting materials and finishes
Creating detailed plans
Permit Approval: 3-8 weeks
Submitting permit applications
City review and approval
Addressing any revisions
Demolition and Prep: 1-2 weeks
Removing existing kitchen
Addressing unexpected issues
Preparing space
Construction: 6-12 weeks
Rough-in electrical and plumbing
Installing cabinets
Countertop fabrication and installation
Flooring installation
Final electrical and plumbing
Backsplash and finishing touches
Total Project Timeline: 3-6 months from initial consultation to completion
Working with Canadoo Enterprises
Since 1995, Canadoo Enterprises has been transforming Vancouver kitchens with a customer-first approach that combines quality craftsmanship, honest communication, and competitive pricing.
Our Process:
Free In-Home Consultation: We visit your home, understand your vision, and provide preliminary guidance
Detailed Design and Quote: Comprehensive proposal including all materials, labor, and permits
Permit Management: We handle all necessary permits and city approvals
Professional Execution: Experienced, licensed tradespeople complete all work
Final Walkthrough: Ensuring every detail meets your expectations
Why Choose Canadoo:
Licensed and insured renovation specialists
Over 25 years serving Vancouver and Burnaby
Transparent pricing with no hidden fees
Project management from start to finish
Quality materials from trusted suppliers
Respect for your home and daily routine
Strong relationships with City of Vancouver permit office
Next Steps: Starting Your Kitchen Renovation
Ready to transform your Vancouver kitchen? Here’s how to begin:
Define Your Goals: Create a list of must-haves and wish-list items
Set a Realistic Budget: Use this guide to establish expectations
Gather Inspiration: Collect images of kitchens you love
Contact Canadoo: Schedule your free consultation at 604-687-6252
Review Your Options: We’ll provide detailed recommendations and accurate pricing
Make Informed Decisions: Choose the approach that best fits your needs and budget
A kitchen renovation is one of the most significant investments you’ll make in your Vancouver home. While costs can seem substantial, understanding the breakdown helps you make strategic decisions that balance your budget with your vision.
Whether you’re planning a budget-friendly refresh or a high-end transformation, the key to success is working with experienced professionals who understand Vancouver’s unique requirements, from permit processes to climate considerations to neighborhood expectations.
At Canadoo Enterprises, we’ve helped hundreds of Vancouver homeowners navigate these decisions successfully. We’re here to turn your kitchen dreams into reality while staying within your budget and timeline.
Ready to start your kitchen renovation?
Contact Canadoo Enterprises today for a free, no-obligation consultation:
If you’re dreaming of a beautifully updated home that reflects your lifestyle and increases your property’s value, you’re in the right place. When it comes to choosing the right home renovation company for your project, experience, integrity, and customer-focused service matter most — which is exactly what Canadoo Enterprises Inc. delivers.
Why Choose a Professional Home Renovation Company?
Home renovation can be one of the most exciting yet demanding investments you make in your property. From planning and permits to design and construction, there’s a lot that goes into a successful project. That’s where a seasoned home renovation company like Canadoo stands out:
Expert Project Management: Renovations involve coordinating timelines, trades, inspections, and permits – professionals manage it all so you don’t have to.
Quality Craftsmanship: Experienced teams ensure work meets the highest standards, adding lasting value and beauty to your home.
Stress-Free Process: From the first consultation to final walkthrough, your renovation partner guides you through every step.
Together, these benefits make a professional renovation company not just a convenience – but a smart investment in your home’s future.
Meet Canadoo: Your Home Renovation Experts
For homeowners in Vancouver and surrounding areas, Canadoo Enterprises Inc. has built a strong reputation as a top home renovation company with decades of experience. Established in 1995, Canadoo combines design expertise, quality construction, and exceptional service to bring your renovation vision to life.
What sets Canadoo apart:
Personalized Approach: Every project starts with your vision – ideas are carefully translated into practical, beautiful results.
Open Communication: You’re kept in the loop through every phase of your renovation, from planning to completion.
Comprehensive Services: Kitchens, bathrooms, bedrooms, living spaces, outdoor decking, additions, and more – no job is too big or too small.
Whether you’re looking to modernize your kitchen, completely transform your bathroom, or refresh your living space, Canadoo delivers professional solutions tailored to your needs.
What Canadoo Offers
A true full-service home renovation company goes beyond just construction. Canadoo specializes in:
Flooring, Lighting, and Interior Upgrades …and much more – all completed with a commitment to craftsmanship and client satisfaction.
Your Home Deserves the Best
A well-executed renovation can rejuvenate your living environment, boost functionality, and increase your home’s resale value. With a professional home renovation company at your side, you can avoid costly mistakes, save time, and enjoy a stress-free transformation from start to finish.
Ready to bring your dream home to life? Explore the possibilities with Canadoo Enterprises Inc. by visiting https://canadoo.ca/home-renovations/ – and take the first step toward a space you’ll love for years to come.
Planning a kitchen renovation in Vancouver, BC? Whether you’re refreshing a Kitsilano condo, updating a family home in East Van, or modernizing a townhouse in Burnaby, having a clear checklist makes the process smoother, faster, and far less stressful. Vancouver’s unique climate, building codes, and housing styles create special considerations – so this guide is tailored specifically to local homeowners.
Below is your complete Vancouver-focused kitchen renovation checklist, from budgeting to permits to final finishes.
1. Set Your Renovation Goals
Start by getting clear on why you’re renovating. Questions to ask yourself:
Are you upgrading for resale value in Vancouver’s competitive market?
Do you need a more functional layout for your family?
Are you aiming for a modern West Coast aesthetic (warm woods, stone, matte black, natural light)?
Is energy efficiency a priority with BC Hydro costs in mind?
Tip: Look at recent kitchen trends in Vancouver – buyers often love open layouts, durable quartz countertops, and high-efficiency appliances.
$80,000+ for a luxury, custom, or large-space remodel
Be sure to include:
Labour
Cabinets
Appliances
Countertops
Plumbing & electrical upgrades
Permits
Contingency fund (10–20%)
3. Check Permit Requirements (City of Vancouver or Local Municipality)
Depending on the scope, you may need one or more permits.
You may need permits if:
You’re removing or moving walls
You’re altering plumbing locations
You’re adding or modifying electrical wiring
You live in a strata (condo/townhouse) and need strata approval
You likely do not need permits for:
Replacing cabinets, countertops, and appliances in the same locations
Cosmetic updates (paint, backsplash, fixtures)
Tip: If you live in a condo, get strata approval early – they often require soundproofing, schedule restrictions, and documentation from your contractor.
4. Hire the Right Vancouver Contractor
Kitchen renos are complex – choosing the right team is crucial.
Bonus: Ask whether they have experience with older Vancouver homes, many of which hide surprises like outdated wiring or plumbing.
5. Plan Your Kitchen Layout
The layout affects how the kitchen feels and functions.
Common Vancouver kitchen layouts:
Galley kitchens (common in condos)
L-shaped or U-shaped
Peninsula or island additions for open layouts
Consider:
The “kitchen work triangle” (sink, stove, fridge)
Traffic flow in small spaces
Maximizing natural light during cloudy Vancouver months
6. Choose Your Materials
Opt for durable, moisture-resistant materials – Vancouver’s damp coastal climate can accelerate wear-and-tear.
Cabinets
Solid wood or high-quality MDF
Soft-close hinges
Custom or semi-custom options
Countertops
Quartz (most popular in Vancouver)
Granite
Butcher block (best if well sealed)
Flooring
Luxury vinyl plank (LVP)
Porcelain tile
Engineered hardwood
Backsplash
Porcelain
Ceramic tile
Glass tile
7. Select Energy-Efficient Appliances
BC Hydro incentives and Vancouver sustainability goals make energy efficiency a smart choice.
Look for:
ENERGY STAR appliances
Induction ranges
Quiet dishwashers for condo living
Counter-depth fridges for small kitchens
8. Plan Electrical & Lighting
Good lighting is essential in the Pacific Northwest, where winter days are short.
Plan for:
Under-cabinet lighting
Pot lights
Pendant lights over islands
A dedicated 20-amp circuit for kitchen appliances
GFCI outlets near water sources
9. Consider Ventilation
With Vancouver’s moisture-rich climate, proper ventilation prevents mold and odours.
Choose:
A high-CFM range hood vented to the exterior
Humidity-resistant paint
Adequate airflow design for condos whose vents may be restricted
10. Final Finishes
These details bring your kitchen together:
Cabinet hardware
Faucet + sink (stainless or granite composite)
Backsplash grout colour
Paint colour (light neutrals are popular for resale)
Smart home features (touchless faucets, smart lighting, smart appliances)
Renovating your kitchen doesn’t have to be overwhelming. By following this checklist, you’ll be better prepared to manage the process, avoid unexpected costs, and create a space that’s both functional and beautifully aligned with West Coast living.
We use cookies to ensure that we give you the best experience on our website. If you continue to use this site we will assume that you are happy with it.Ok