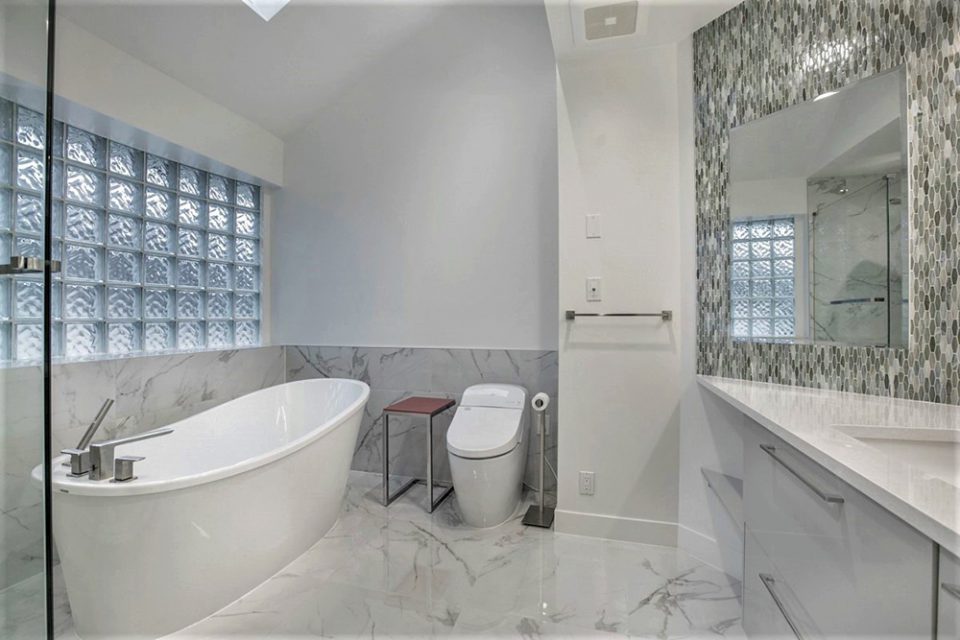
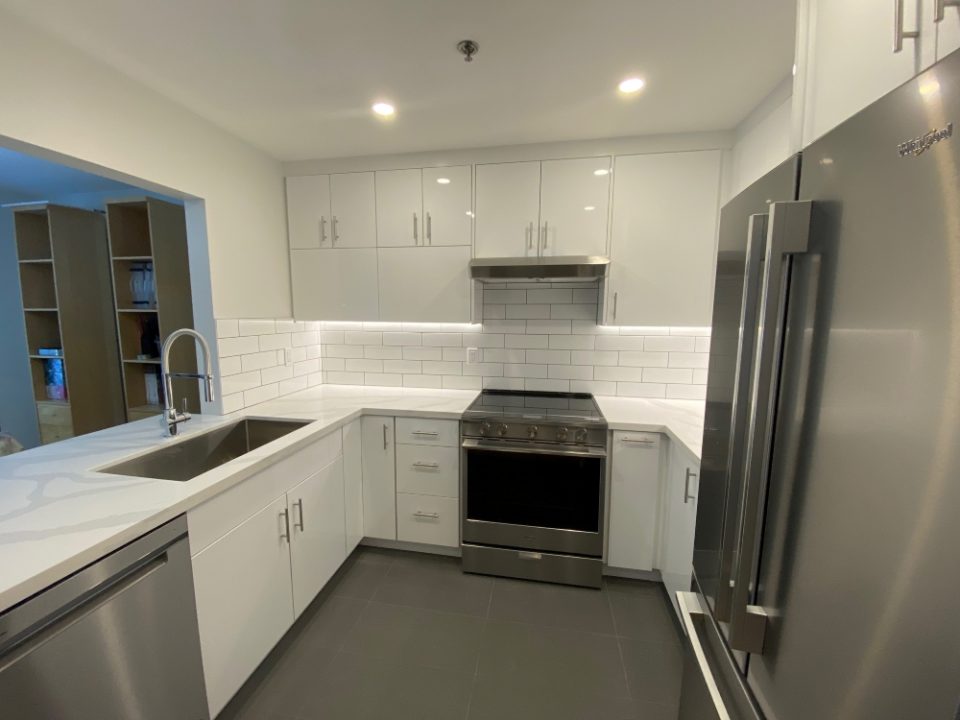
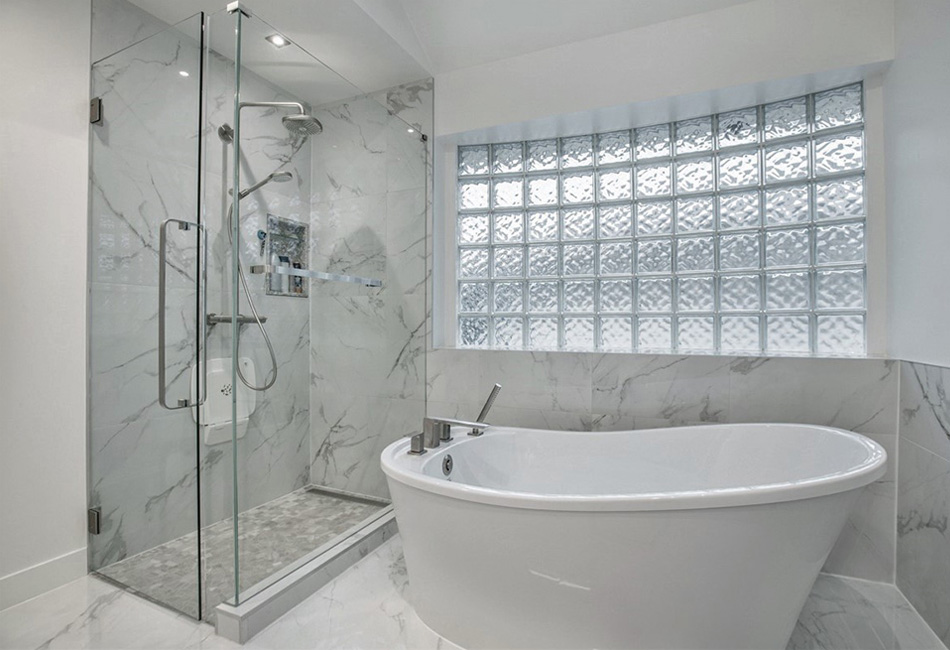
A beautiful, functional bathroom can make a huge difference in your home. Whether you’re in Vancouver, Burnaby, Richmond, or anywhere in the Lower Mainland, BC, a professional bathroom renovation can add value, comfort, and style to your property.
In this blog, we’ll explore key considerations for a successful bathroom renovation, highlight design trends, and explain why hiring an expert team is essential.
Why Renovate Your Bathroom?
Bathroom renovations aren’t just about aesthetics – they’re about improving functionality, efficiency, and home value.
Top Benefits:
Increased home value – A modern, updated bathroom can boost your property’s resale value.
Improved comfort & usability – Smart layouts, better lighting, and upgraded fixtures make daily routines easier.
Energy and water efficiency – Modern fixtures reduce water consumption and utility bills.
Personalized style – Create a bathroom that reflects your taste and lifestyle.
Key Bathroom Renovation Tips
1. Plan Your Layout Wisely
Consider traffic flow, accessibility, and storage needs. For small bathrooms, space-saving fixtures like wall-mounted vanities and sliding doors can make a big difference.
2. Choose Durable Materials
In Vancouver and the Lower Mainland, moisture and humidity are significant concerns. Choose water-resistant materials for floors, walls, and countertops, such as porcelain tiles, quartz, or treated wood.
3. Update Fixtures & Plumbing
Replacing outdated faucets, showerheads, and toilets not only improves style but also enhances water efficiency. Consider modern, low-flow options to save water and reduce bills.
4. Focus on Lighting & Ventilation
Proper lighting and ventilation are crucial to prevent mold and mildew. Combine ambient, task, and accent lighting for a balanced look, and ensure your bathroom has a good exhaust fan.
5. Add Storage Solutions
Maximize your bathroom space with clever storage:
Recessed shelves in showers
Floating vanities with drawers
Built-in cabinets for towels and toiletries
6. Hire a Professional Renovation Team
A professional bathroom renovation company can:
Ensure high-quality workmanship
Handle plumbing, electrical, and structural updates
Keep your renovation on budget and on schedule
Bathroom Renovations Across the Lower Mainland
We serve homeowners throughout Vancouver, Burnaby, Richmond, and surrounding areas. Our team specializes in:
Full bathroom remodels
Shower and tub upgrades
Vanity, lighting, and flooring installation
Custom designs tailored to your home and lifestyle
No matter the size or style of your project, we deliver beautiful, durable, and functional bathrooms.
Ready to Upgrade Your Bathroom?
Don’t settle for a bathroom that doesn’t meet your needs or style. Transform your space with a professional renovation team you can trust.
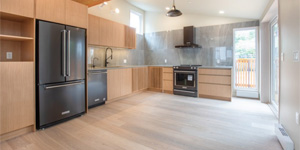
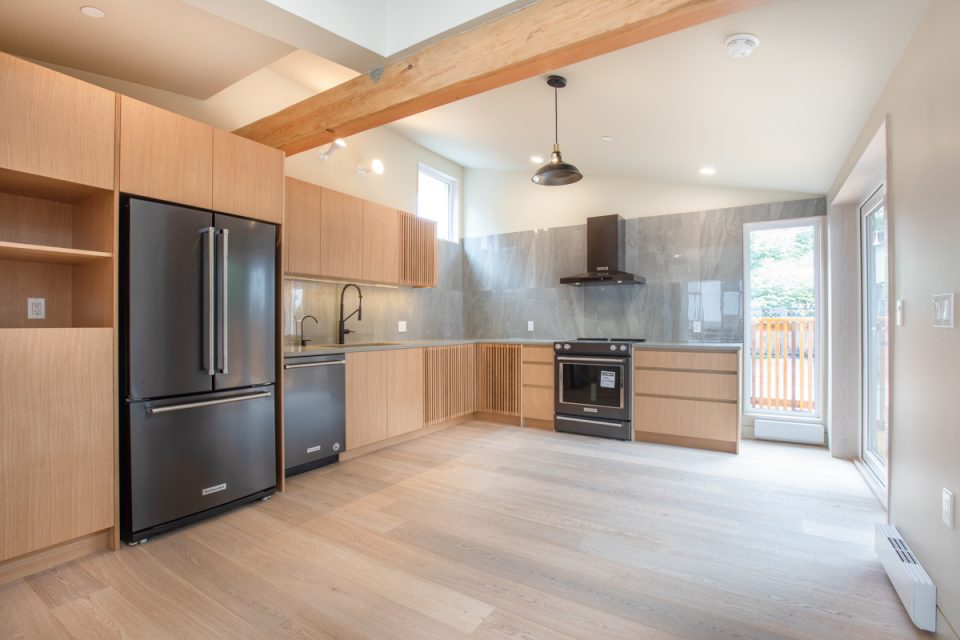
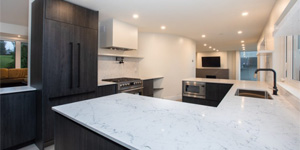
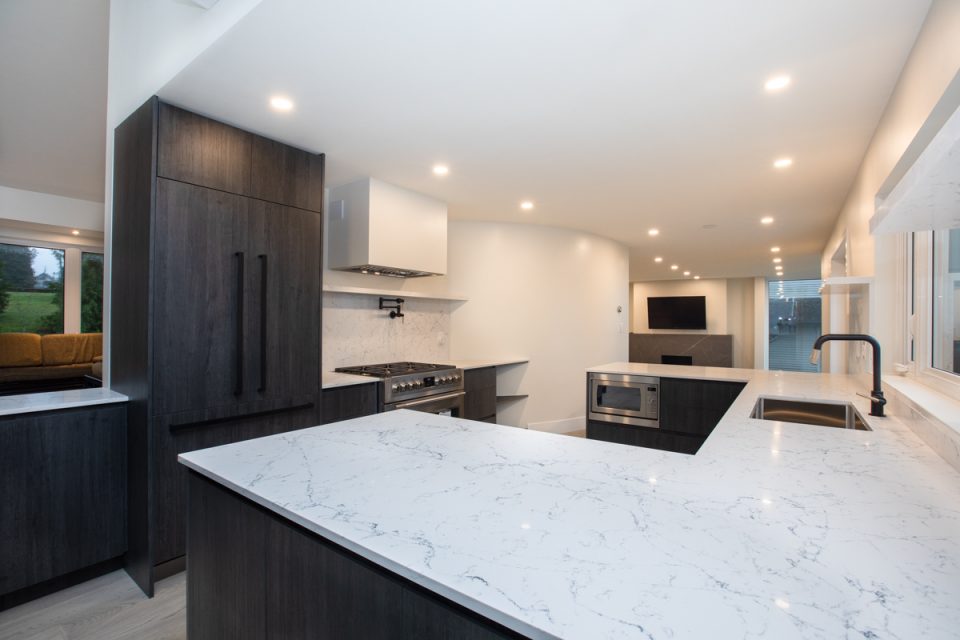
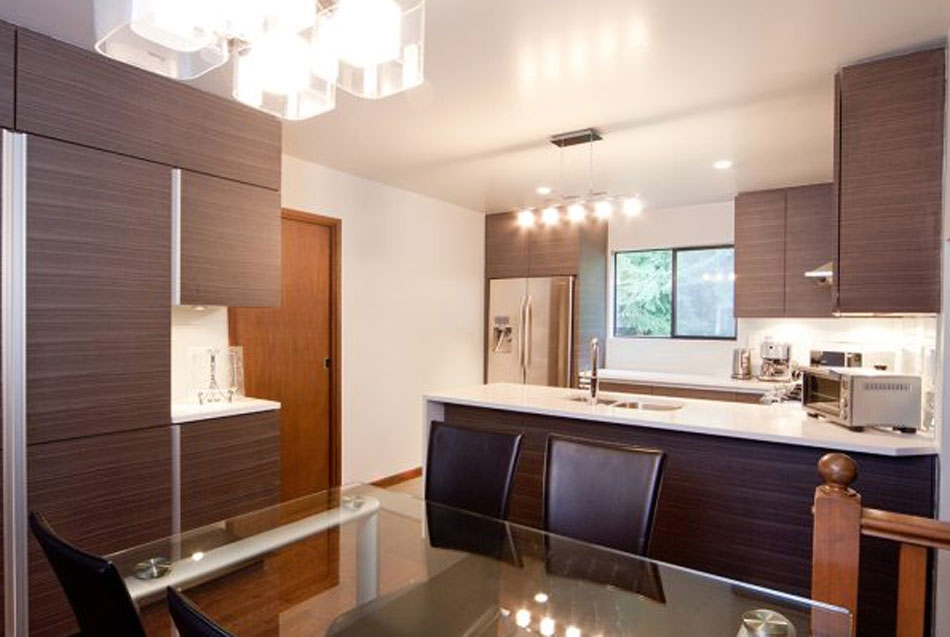
Planning a kitchen renovation in Vancouver? You’re making one of the smartest investments in your home. A well-executed kitchen remodel not only transforms your daily living experience but can recoup 75-90% of its cost when you sell your property. However, understanding the true costs involved is essential for creating a realistic budget and avoiding expensive surprises.
As Vancouver’s trusted renovation experts since 1995, Canadoo Enterprises has guided hundreds of homeowners through successful kitchen transformations. This comprehensive guide breaks down everything you need to know about kitchen renovation costs in Vancouver for 2026.
Quick Overview: What to Expect
Kitchen renovation costs in Vancouver vary significantly based on project scope, materials, and your home’s specific needs. Here’s what you can expect:
Budget-Friendly Refresh: $20,000 – $35,000
Mid-Range Renovation: $50,000 – $85,000
High-End Transformation: $75,000 – $150,000+
The average kitchen renovation in Vancouver currently sits around $55,000 to $70,000, though your specific project cost will depend on numerous factors we’ll explore below.
Breaking Down Kitchen Renovation Costs by Project Type
These ranges account for materials, labor, and basic permit costs but may not include structural changes or high-end custom features.
Detailed Cost Breakdown by Component
Understanding individual component costs helps you make informed decisions about where to invest your budget:
Cabinetry ($9,500 – $26,500)
Cabinets typically consume 30-40% of your total kitchen budget and have the biggest visual impact:
Stock cabinets (IKEA or similar): $3,000 – $8,000
Semi-custom cabinets: $12,000 – $20,000
Fully custom cabinets: $18,000 – $30,000+
Canadoo Tip: Quality cabinetry is worth the investment. We recommend focusing budget here rather than on trendy backsplash or hardware that’s easier to update later.
Countertops ($3,000 – $12,000)
Your choice of countertop material significantly impacts both cost and functionality:
Laminate: $1,500 – $3,500 (30-40 per sq ft installed)
Quartz: $4,500 – $9,000 ($90 – $170 per sq ft)
Granite: $4,000 – $8,500 ($80 – $150 per sq ft)
Marble: $6,000 – $12,000+ ($120 – $200 per sq ft)
Vancouver Climate Consideration: Quartz is our top recommendation for Vancouver kitchens. It’s durable, non-porous, low-maintenance, and handles our humid climate better than natural stone.
Appliances ($2,000 – $15,000+)
Appliance costs vary dramatically based on brand and features:
A typical mid-range appliance package includes a refrigerator ($1,500-$3,000), range/cooktop ($800-$2,500), dishwasher ($600-$1,200), and range hood ($400-$1,500).
Flooring ($2,000 – $8,000)
Kitchen flooring must withstand heavy traffic and moisture:
Vinyl plank: $2,000 – $4,000
Ceramic or porcelain tile: $3,000 – $6,000
Engineered hardwood: $4,000 – $7,000
Solid hardwood: $5,000 – $9,000+
Pro Tip: For Vancouver’s climate, we often recommend porcelain tile or engineered hardwood over solid hardwood, as they handle moisture fluctuations better.
Labor Costs ($15,000 – $45,000)
Professional labor ensures code compliance and quality workmanship:
Demolition: $1,000 – $3,000
Plumbing: $2,000 – $6,000
Electrical: $2,500 – $7,000
Cabinetry installation: $2,000 – $5,000
Countertop installation: $500 – $2,000
Tile/backsplash installation: $1,500 – $4,000
Project management and coordination: $3,000 – $8,000
Vancouver’s active housing market means labor rates average $80-$160 per hour, higher than many Canadian cities.
Lighting ($1,200 – $4,200)
Modern kitchen lighting includes multiple layers:
Recessed pot lights: $150 – $400 per fixture installed
Backsplash costs depend on material choice and installation complexity:
Ceramic tile: $25 – $45 per sq ft installed
Glass tile: $35 – $65 per sq ft installed
Natural stone: $40 – $80 per sq ft installed
Custom mosaic or designer tile: $60 – $150+ per sq ft installed
Vancouver-Specific Cost Factors
Several unique factors affect kitchen renovation costs in our city:
Permits and Inspections ($500 – $3,000)
The City of Vancouver requires permits for most kitchen renovations involving:
Moving or removing walls
Relocating sinks, stoves, or dishwashers
Electrical upgrades or panel replacements
Gas line modifications
Any structural changes
Basic kitchen renovation permits start around $500-$800, while comprehensive renovations requiring structural, electrical, and plumbing permits can reach $2,000-$3,000.
Energy Efficiency Requirements: For renovations valued over $20,000, Vancouver requires an EnerGuide evaluation and energy upgrade proposal, adding $500-$1,500 to your costs.
Condo and Strata Considerations ($300 – $1,500)
Vancouver’s high density means many kitchen renovations occur in condos:
Unexpected Issues in Older Homes ($2,000 – $20,000)
Vancouver’s heritage and character homes often reveal surprises:
Asbestos removal: $3,000 – $15,000
Mold remediation: $2,000 – $12,000
Electrical panel upgrades: $2,500 – $5,000
Plumbing system updates: $3,000 – $8,000
Structural repairs: $5,000 – $20,000+
Canadoo Recommendation: Budget 15-20% contingency for unexpected issues, especially in homes built before 1980.
Neighborhood Cost Variations
Kitchen renovation costs can vary by Vancouver neighborhood:
West Vancouver: $200 – $350 per sq ft (highest due to luxury expectations)
Kitsilano, Point Grey, Kerrisdale: $150 – $280 per sq ft (upper-mid to high-end)
Mount Pleasant, Commercial Drive: $130 – $220 per sq ft (mid-range)
Burnaby, New Westminster: $120 – $200 per sq ft (slightly lower than Vancouver core)
Condo kitchens (Downtown, Yaletown): $140 – $250 per sq ft (space constraints increase per-square-foot costs)
Money-Saving Strategies Without Sacrificing Quality
1. Maintain Your Existing Layout
Moving plumbing and electrical adds $5,000-$15,000 to your budget. If your current layout works reasonably well, keeping appliances and sinks in place saves substantially.
2. Reface Instead of Replace Cabinets
If your cabinet boxes are structurally sound, refacing costs $3,000-$8,000 versus $12,000-$25,000 for full replacement.
3. Choose Mid-Range Materials Strategically
Opt for quartz over marble (save $2,000-$4,000)
Select engineered hardwood over solid (save $1,500-$3,000)
Use ceramic tile instead of natural stone backsplash (save $800-$2,000)
4. Time Your Renovation Strategically
Winter renovations (November-February) can save 10-20% on labor costs as contractors have more availability.
5. Handle Prep and Finishing Work
If you’re handy, you can save $2,000-$5,000 by:
Doing your own demolition
Removing and disposing of old appliances
Painting walls yourself
Installing simple hardware
6. Shop Sales for Appliances and Fixtures
Major sales (Black Friday, Boxing Day, spring clearance) can save 20-40% on appliances and fixtures.
7. Use a Full-Service Renovation Company
Working with one company like Canadoo for design, project management, and execution often costs less than coordinating multiple contractors separately, while ensuring better quality control.
Return on Investment: Is It Worth It?
Kitchen renovations offer strong financial returns in Vancouver’s competitive real estate market:
Mid-range kitchen renovation: 75-90% ROI
High-end kitchen renovation: 65-75% ROI
Minor kitchen refresh: 80-95% ROI
Beyond resale value, consider these non-financial returns:
Improved daily functionality and family enjoyment
Reduced energy costs with efficient appliances
Increased home safety with updated electrical and plumbing
Enhanced entertaining and hosting capabilities
Personal satisfaction from a beautiful, customized space
Planning Your Kitchen Renovation Budget
Follow these steps for successful budget planning:
Step 1: Determine Your Total Budget
Include renovation costs plus 15-20% contingency for unexpected issues.
Step 2: Prioritize Your Goals
List must-haves versus nice-to-haves. Focus spending on elements that matter most to your daily use.
Step 3: Get Professional Input Early
Consult with experienced renovation contractors like Canadoo before finalizing plans. We can identify potential issues and cost-saving opportunities.
Step 4: Obtain Multiple Detailed Quotes
Get at least three quotes from licensed contractors. Compare scope of work carefully, not just bottom-line numbers.
Step 5: Review Financing Options
Consider:
Home equity line of credit (typically 5-7% interest)
Refinancing your mortgage
Personal savings
Home renovation loans
Step 6: Build in Contingency
Set aside 15-20% of your budget for unexpected discoveries, especially in older Vancouver homes.
Red Flags to Avoid
Protect yourself from cost overruns and poor quality:
Contractors without proper licensing (BC requires licensing for projects over $10,000)
Quotes significantly lower than others (typically indicates cut corners or hidden costs)
Pressure to start immediately without permits
Vague contracts without detailed specifications
No insurance or WorkSafeBC coverage
Unwillingness to provide references or portfolio
Timeline Expectations
Understanding realistic timelines helps with planning:
Planning and Design: 2-4 weeks
Developing design concepts
Selecting materials and finishes
Creating detailed plans
Permit Approval: 3-8 weeks
Submitting permit applications
City review and approval
Addressing any revisions
Demolition and Prep: 1-2 weeks
Removing existing kitchen
Addressing unexpected issues
Preparing space
Construction: 6-12 weeks
Rough-in electrical and plumbing
Installing cabinets
Countertop fabrication and installation
Flooring installation
Final electrical and plumbing
Backsplash and finishing touches
Total Project Timeline: 3-6 months from initial consultation to completion
Working with Canadoo Enterprises
Since 1995, Canadoo Enterprises has been transforming Vancouver kitchens with a customer-first approach that combines quality craftsmanship, honest communication, and competitive pricing.
Our Process:
Free In-Home Consultation: We visit your home, understand your vision, and provide preliminary guidance
Detailed Design and Quote: Comprehensive proposal including all materials, labor, and permits
Permit Management: We handle all necessary permits and city approvals
Professional Execution: Experienced, licensed tradespeople complete all work
Final Walkthrough: Ensuring every detail meets your expectations
Why Choose Canadoo:
Licensed and insured renovation specialists
Over 25 years serving Vancouver and Burnaby
Transparent pricing with no hidden fees
Project management from start to finish
Quality materials from trusted suppliers
Respect for your home and daily routine
Strong relationships with City of Vancouver permit office
Next Steps: Starting Your Kitchen Renovation
Ready to transform your Vancouver kitchen? Here’s how to begin:
Define Your Goals: Create a list of must-haves and wish-list items
Set a Realistic Budget: Use this guide to establish expectations
Gather Inspiration: Collect images of kitchens you love
Contact Canadoo: Schedule your free consultation at 604-687-6252
Review Your Options: We’ll provide detailed recommendations and accurate pricing
Make Informed Decisions: Choose the approach that best fits your needs and budget
A kitchen renovation is one of the most significant investments you’ll make in your Vancouver home. While costs can seem substantial, understanding the breakdown helps you make strategic decisions that balance your budget with your vision.
Whether you’re planning a budget-friendly refresh or a high-end transformation, the key to success is working with experienced professionals who understand Vancouver’s unique requirements, from permit processes to climate considerations to neighborhood expectations.
At Canadoo Enterprises, we’ve helped hundreds of Vancouver homeowners navigate these decisions successfully. We’re here to turn your kitchen dreams into reality while staying within your budget and timeline.
Ready to start your kitchen renovation?
Contact Canadoo Enterprises today for a free, no-obligation consultation:
If you’re dreaming of a beautifully updated home that reflects your lifestyle and increases your property’s value, you’re in the right place. When it comes to choosing the right home renovation company for your project, experience, integrity, and customer-focused service matter most — which is exactly what Canadoo Enterprises Inc. delivers.
Why Choose a Professional Home Renovation Company?
Home renovation can be one of the most exciting yet demanding investments you make in your property. From planning and permits to design and construction, there’s a lot that goes into a successful project. That’s where a seasoned home renovation company like Canadoo stands out:
Expert Project Management: Renovations involve coordinating timelines, trades, inspections, and permits – professionals manage it all so you don’t have to.
Quality Craftsmanship: Experienced teams ensure work meets the highest standards, adding lasting value and beauty to your home.
Stress-Free Process: From the first consultation to final walkthrough, your renovation partner guides you through every step.
Together, these benefits make a professional renovation company not just a convenience – but a smart investment in your home’s future.
Meet Canadoo: Your Home Renovation Experts
For homeowners in Vancouver and surrounding areas, Canadoo Enterprises Inc. has built a strong reputation as a top home renovation company with decades of experience. Established in 1995, Canadoo combines design expertise, quality construction, and exceptional service to bring your renovation vision to life.
What sets Canadoo apart:
Personalized Approach: Every project starts with your vision – ideas are carefully translated into practical, beautiful results.
Open Communication: You’re kept in the loop through every phase of your renovation, from planning to completion.
Comprehensive Services: Kitchens, bathrooms, bedrooms, living spaces, outdoor decking, additions, and more – no job is too big or too small.
Whether you’re looking to modernize your kitchen, completely transform your bathroom, or refresh your living space, Canadoo delivers professional solutions tailored to your needs.
What Canadoo Offers
A true full-service home renovation company goes beyond just construction. Canadoo specializes in:
Flooring, Lighting, and Interior Upgrades …and much more – all completed with a commitment to craftsmanship and client satisfaction.
Your Home Deserves the Best
A well-executed renovation can rejuvenate your living environment, boost functionality, and increase your home’s resale value. With a professional home renovation company at your side, you can avoid costly mistakes, save time, and enjoy a stress-free transformation from start to finish.
Ready to bring your dream home to life? Explore the possibilities with Canadoo Enterprises Inc. by visiting https://canadoo.ca/home-renovations/ – and take the first step toward a space you’ll love for years to come.
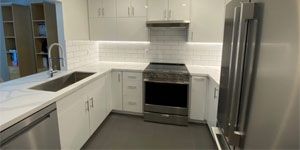
Planning a kitchen renovation in Vancouver, BC? Whether you’re refreshing a Kitsilano condo, updating a family home in East Van, or modernizing a townhouse in Burnaby, having a clear checklist makes the process smoother, faster, and far less stressful. Vancouver’s unique climate, building codes, and housing styles create special considerations – so this guide is tailored specifically to local homeowners.
Below is your complete Vancouver-focused kitchen renovation checklist, from budgeting to permits to final finishes.
1. Set Your Renovation Goals
Start by getting clear on why you’re renovating. Questions to ask yourself:
Are you upgrading for resale value in Vancouver’s competitive market?
Do you need a more functional layout for your family?
Are you aiming for a modern West Coast aesthetic (warm woods, stone, matte black, natural light)?
Is energy efficiency a priority with BC Hydro costs in mind?
Tip: Look at recent kitchen trends in Vancouver – buyers often love open layouts, durable quartz countertops, and high-efficiency appliances.
$80,000+ for a luxury, custom, or large-space remodel
Be sure to include:
Labour
Cabinets
Appliances
Countertops
Plumbing & electrical upgrades
Permits
Contingency fund (10–20%)
3. Check Permit Requirements (City of Vancouver or Local Municipality)
Depending on the scope, you may need one or more permits.
You may need permits if:
You’re removing or moving walls
You’re altering plumbing locations
You’re adding or modifying electrical wiring
You live in a strata (condo/townhouse) and need strata approval
You likely do not need permits for:
Replacing cabinets, countertops, and appliances in the same locations
Cosmetic updates (paint, backsplash, fixtures)
Tip: If you live in a condo, get strata approval early – they often require soundproofing, schedule restrictions, and documentation from your contractor.
4. Hire the Right Vancouver Contractor
Kitchen renos are complex – choosing the right team is crucial.
Bonus: Ask whether they have experience with older Vancouver homes, many of which hide surprises like outdated wiring or plumbing.
5. Plan Your Kitchen Layout
The layout affects how the kitchen feels and functions.
Common Vancouver kitchen layouts:
Galley kitchens (common in condos)
L-shaped or U-shaped
Peninsula or island additions for open layouts
Consider:
The “kitchen work triangle” (sink, stove, fridge)
Traffic flow in small spaces
Maximizing natural light during cloudy Vancouver months
6. Choose Your Materials
Opt for durable, moisture-resistant materials – Vancouver’s damp coastal climate can accelerate wear-and-tear.
Cabinets
Solid wood or high-quality MDF
Soft-close hinges
Custom or semi-custom options
Countertops
Quartz (most popular in Vancouver)
Granite
Butcher block (best if well sealed)
Flooring
Luxury vinyl plank (LVP)
Porcelain tile
Engineered hardwood
Backsplash
Porcelain
Ceramic tile
Glass tile
7. Select Energy-Efficient Appliances
BC Hydro incentives and Vancouver sustainability goals make energy efficiency a smart choice.
Look for:
ENERGY STAR appliances
Induction ranges
Quiet dishwashers for condo living
Counter-depth fridges for small kitchens
8. Plan Electrical & Lighting
Good lighting is essential in the Pacific Northwest, where winter days are short.
Plan for:
Under-cabinet lighting
Pot lights
Pendant lights over islands
A dedicated 20-amp circuit for kitchen appliances
GFCI outlets near water sources
9. Consider Ventilation
With Vancouver’s moisture-rich climate, proper ventilation prevents mold and odours.
Choose:
A high-CFM range hood vented to the exterior
Humidity-resistant paint
Adequate airflow design for condos whose vents may be restricted
10. Final Finishes
These details bring your kitchen together:
Cabinet hardware
Faucet + sink (stainless or granite composite)
Backsplash grout colour
Paint colour (light neutrals are popular for resale)
Smart home features (touchless faucets, smart lighting, smart appliances)
Renovating your kitchen doesn’t have to be overwhelming. By following this checklist, you’ll be better prepared to manage the process, avoid unexpected costs, and create a space that’s both functional and beautifully aligned with West Coast living.
Living in Vancouver means embracing our unique climate – beautiful but often cloudy. With an average of only 1,938 hours of sunshine per year, making the most of natural light in your home isn’t just about aesthetics; it’s about creating a healthier, more inviting living space that combats those gray Pacific Northwest days.
At Canadoo, we’ve spent nearly three decades helping Vancouver homeowners transform dark, dreary spaces into bright, welcoming homes. Whether you’re in a heritage house in Kitsilano, a condo downtown, or a family home in Burnaby, these renovation strategies will help you maximize every ray of natural light.
Why Natural Light Matters in Vancouver Homes
Before diving into renovation solutions, it’s worth understanding why natural light is so valuable:
Improves mood and mental health during long, rainy winters
Reduces energy costs by decreasing reliance on artificial lighting
Makes spaces feel larger and more open
Increases home value and market appeal
Enhances color accuracy in interior design
Supports better sleep cycles through natural circadian rhythm regulation
Strategic Window Replacements and Upgrades
Choose the Right Window Style
Not all windows are created equal when it comes to light transmission. Consider these options:
Floor-to-Ceiling Windows: Perfect for living rooms and dining areas, these dramatic windows can flood your space with light. In Vancouver’s temperate climate, modern triple-pane glass provides excellent insulation while maximizing transparency.
Bay and Bow Windows: These extend beyond your exterior wall, capturing light from multiple angles. They’re ideal for north-facing rooms that receive less direct sunlight.
Picture Windows: Large, fixed panes without dividers allow maximum light penetration. Combine them with operable casement windows on either side for ventilation.
Corner Windows: Where two walls meet, corner windows eliminate the visual barrier and create stunning light corridors, perfect for Vancouver’s mountain and ocean views.
Window Placement Strategies
South-Facing Opportunities: In the Northern Hemisphere, south-facing windows receive the most consistent sunlight throughout the year. If you’re planning an addition or major renovation, prioritize southern exposure.
Clerestory Windows: These high-mounted windows are excellent for bringing light deep into your home while maintaining privacy – perfect for bathrooms or homes close to neighbors.
Transom Windows: Installing windows above doorways allows light to flow between rooms, particularly effective in hallway renovations.
Glass Selection Matters
Work with your renovation contractor to select the right glass:
Low-E coatings reduce heat loss without significantly affecting light transmission
Clear glass maximizes light but may require window treatments for privacy
Larger panes with fewer mullions reduce visual obstruction
Energy-efficient triple-pane windows are essential for Vancouver’s climate while maintaining brightness
Skylight Installation: Bringing Light from Above
Skylights are game-changers for Vancouver homes, especially in spaces where wall windows aren’t practical.
Best Locations for Skylights
Kitchens: Illuminate work surfaces and create a connection to the outdoors
Bathrooms: Natural light makes morning routines more pleasant and reduces moisture issues
Hallways and stairwells: Often the darkest areas in a home
Home offices: Natural overhead light reduces eye strain and boosts productivity
Bedrooms: Wake up naturally with morning light (consider blackout shades for flexibility)
Skylight Types for Vancouver Homes
Fixed Skylights: Most affordable option, ideal for high ceilings or hard-to-reach locations.
Vented Skylights: Can be opened for ventilation, perfect for Vancouver’s humid climate to reduce condensation and improve air circulation.
Tubular Skylights (Sun Tunnels): Excellent for smaller spaces like closets, powder rooms, or interior hallways. These reflective tubes channel sunlight from your roof to spaces that would otherwise require artificial lighting all day.
Solar-Powered Skylights: Feature built-in shades and rain sensors that close automatically – ideal for Vancouver’s unpredictable weather.
Important Skylight Considerations
Ensure proper flashing installation to prevent leaks (critical in rainy Vancouver)
Choose skylights with high energy-efficiency ratings
Consider automated shades for temperature and light control
Work with experienced installers familiar with Vancouver building codes
Interior Design Solutions That Amplify Light
Color Palette Choices
Your color scheme dramatically affects how light behaves in your space:
White and off-white walls reflect up to 80% of available light
Light gray tones add sophistication while maintaining brightness
Soft pastels reflect light while adding subtle color
Glossy finishes on walls and ceilings bounce more light than matte
Light-colored flooring (maple, ash, or light oak) reflects upward light
Reflective Surfaces and Materials
Strategically place reflective elements to multiply natural light:
Mirrors: Position large mirrors opposite or adjacent to windows to double the perceived light. In narrow hallways, a full-length mirror wall can transform the space.
Glass and Acrylic: Use glass tabletops, acrylic chairs, and transparent accessories that don’t block light flow.
Metallic Accents: Polished chrome, brushed nickel, and brass fixtures reflect and scatter light beautifully.
High-Gloss Tiles: In kitchen and bathroom renovations, choose glossy backsplashes and large-format tiles that create light-reflecting surfaces.
Open Concept Renovations
Removing non-load-bearing walls allows light to travel throughout your home:
Kitchen-living room combinations let window light flow freely
Glass-paneled interior doors maintain separation while allowing light passage
Half-walls or pony walls with glass panels preserve some division without blocking light
Open shelving instead of closed cabinets prevents light obstruction
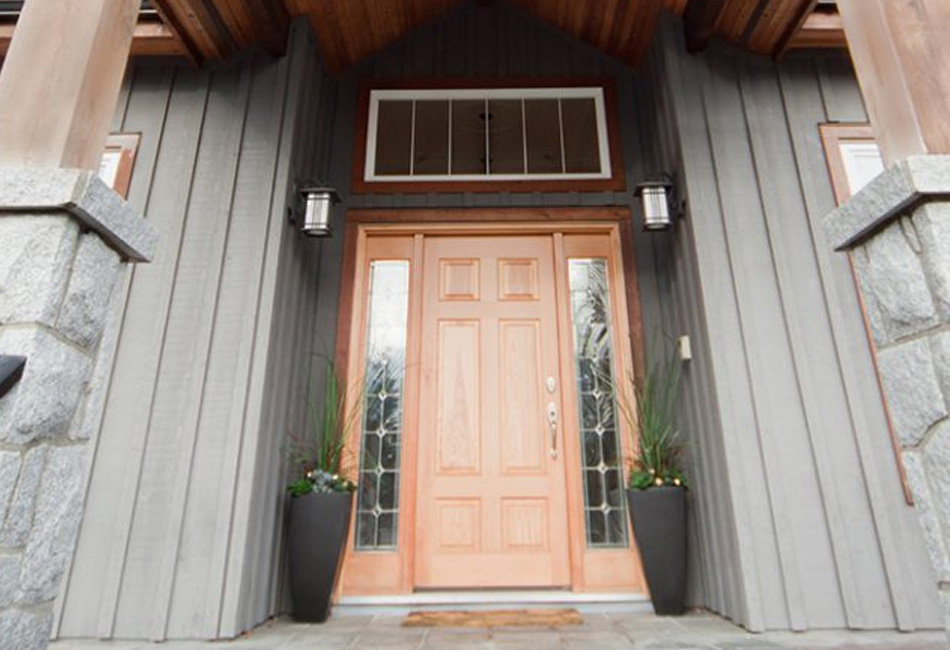
Door Replacements for Enhanced Brightness
Don’t overlook doors in your light-maximizing renovation:
Front Doors with Glass Panels: Modern designs with sidelights or transoms add curb appeal while illuminating entryways.
French Doors: Perfect for connecting interior spaces or opening to patios, these allow maximum light flow.
Sliding Glass Doors: Contemporary large-format sliders can span entire walls, essentially turning your wall into a window.
Interior Glass Doors: Frosted or clear glass interior doors maintain privacy while allowing light to travel between rooms.
Structural Renovations for Dramatic Results
Adding Dormers
For homes with attic space, dormers add both square footage and natural light. In Vancouver’s heritage neighborhoods, dormers can be designed to complement traditional architecture while modernizing interiors.
Vaulted Ceilings
Opening up a ceiling to the roof line and adding high windows or skylights creates dramatic vertical space and light. This works particularly well in bungalows common throughout Vancouver.
Light Wells and Atriums
For larger renovations, creating an interior courtyard or light well brings natural light to the center of your home – a luxury feature increasingly popular in Vancouver’s urban homes.
Bump-Outs and Additions
Sometimes the best solution is expanding outward. Bay window bump-outs or small additions on south-facing walls can transform dark rooms without a complete home renovation.
Window Treatment Strategies
The right window treatments maximize light when you want it while providing privacy when needed:
Sheer curtains filter light gently while maintaining daytime privacy
Top-down bottom-up shades let light in from above while blocking views at eye level
Motorized shades can be programmed to open with sunrise
Light-colored fabrics reflect rather than absorb sunlight
Minimal hardware reduces visual clutter and obstruction
Outdoor Considerations
Don’t forget the exterior:
Trim Overgrown Trees and Shrubs: Vancouver’s lush vegetation can block significant light. Strategic pruning opens up views and allows more light penetration.
Light-Colored Exterior Paint: Surfaces outside your windows reflect light inward. Consider lighter siding or trim around windows.
Reflective Landscaping: Light-colored gravel, concrete pavers, or decorative stones reflect light upward into windows better than dark mulch or grass.
Clean Windows Regularly: Vancouver’s rain and atmospheric moisture leave deposits. Professional window cleaning 2-3 times yearly makes a noticeable difference.
Budget-Friendly Light-Maximizing Updates
Not every solution requires major construction:
Replace solid interior doors with glass-paneled versions ($300-$800 per door)
Install larger mirrors strategically ($100-$500)
Paint walls and ceilings in lighter colors ($500-$2,000 for most rooms)
Add tubular skylights to small spaces ($500-$1,500 installed)
Replace heavy window treatments with sheer or light-filtering options ($50-$300 per window)
Upgrade to larger windows in existing openings ($500-$1,500 per window)
Working with Vancouver Building Codes
Any window, skylight, or structural renovation must comply with local regulations:
Energy efficiency requirements: New windows must meet specific performance standards
Egress requirements: Bedroom windows must meet size and accessibility requirements for emergency exit
Heritage home restrictions: Character homes may have limitations on exterior changes
Permit requirements: Most window replacements and all structural changes require permits
Working with an experienced Vancouver renovation contractor ensures your project meets all code requirements while achieving your light-maximizing goals.
The Canadoo Approach to Brighter Homes
At Canadoo, we take a holistic approach to maximizing natural light in your renovation:
Comprehensive Assessment: We evaluate your home’s orientation, existing light sources, and architectural constraints
Custom Solutions: Every Vancouver home is unique – we design solutions tailored to your specific space and budget
Quality Materials: We source energy-efficient windows and skylights that perform well in our coastal climate
Expert Installation: Our experienced team ensures weathertight installation critical for Vancouver’s rainfall
Integrated Design: We coordinate lighting solutions with your overall renovation vision for cohesive results
Real Results: Before and After
Over our 30 years serving Vancouver homeowners, we’ve transformed countless dark spaces into light-filled sanctuaries. From opening up cramped Kitsilano kitchens with new skylights to installing floor-to-ceiling windows in East Van living rooms, we’ve seen firsthand how natural light transforms not just spaces, but how families live in them.
Ready to Brighten Your Vancouver Home?
Don’t let Vancouver’s cloudy skies dictate how bright your home feels. With the right renovation strategies, you can create a light-filled space that enhances your daily life and increases your home’s value.
Get Your Free Consultation Today
Our renovation experts will assess your home and provide personalized recommendations for maximizing natural light within your budget. With nearly 30 years of experience transforming Vancouver homes, Canadoo has the expertise to bring your vision to life.
Canadoo has been Vancouver’s trusted home renovation partner since 1995, specializing in kitchens, bathrooms, and complete home transformations. Licensed, insured, and committed to exceptional craftsmanship.
Embarking on a home renovation can be one of the most exciting projects you undertake. It’s a chance to transform your living space, improve functionality, and increase your property’s value. However, a successful renovation doesn’t happen by chance. It requires careful planning and thoughtful execution. This guide provides a clear roadmap to help you navigate the process from start to finish, ensuring your vision becomes a reality with minimal stress.
We will walk you through the essential steps, from defining your goals and setting a realistic budget to hiring the right team and managing the project. With a solid plan in place, you can move forward with confidence and turn your dream home into a tangible space you’ll love for years to come.
Step 1: Define Your Goals and Vision
Before you knock down any walls or pick out paint colors, you need a clear vision. This foundational step guides every decision you’ll make throughout the project. Take time to think about what you want to achieve with your renovation.
Identify Your “Why”
Start by asking yourself why you want to renovate. Are you looking to update an outdated kitchen, create more space for a growing family, or improve the flow of your living areas? Understanding your primary motivation helps you prioritize your needs and wants. Make a list of everything you dislike about your current space and what you hope to gain from the renovation.
Gather Inspiration
This is the fun part. Create a mood board to visually define your style. Use platforms like Pinterest and Instagram, or clip images from design magazines. Collect pictures of layouts, color schemes, materials, and fixtures that you love. This collection of images will be an invaluable tool when communicating your vision to designers and contractors. Don’t limit yourself to just one style; mixing elements can create a unique and personal space.
Distinguish Needs from Wants
With your inspiration in hand, create two columns: “Must-Haves” and “Nice-to-Haves.” Your must-haves are the non-negotiable elements essential to the project’s success. For a kitchen remodel, this might include new countertops and functional cabinetry. Nice-to-haves could be a wine fridge or a high-end espresso machine. This list will be crucial when you move on to budgeting.
Step 2: Create a Realistic Budget
Your budget is the backbone of your renovation project. A well-planned budget prevents financial strain and helps you make smart decisions. Home renovations often cost more than initially expected, so it’s vital to be thorough and realistic.
Determine Your Total Budget
Decide how much you are comfortable spending. This figure should include everything from materials and labor to permits and a contingency fund. Consider how you will finance the project. Will you use savings, a home equity line of credit (HELOC), or a personal loan? Knowing your total available funds sets the boundaries for your project scope.
Research Costs and Get Estimates
Start researching the average costs for the type of renovation you’re planning in your area. Look at online resources, talk to friends who have done similar projects, and begin getting rough estimates. While you won’t have firm quotes yet, this initial research helps you understand if your budget aligns with your vision. If there’s a big gap, you may need to revisit your “Needs vs. Wants” list.
Build in a Contingency Fund
Unexpected issues are almost a guarantee in any renovation. You might discover hidden water damage, outdated wiring, or structural problems once demolition begins. To prepare for these surprises, set aside 15-20% of your total budget as a contingency fund. This financial cushion ensures that unforeseen costs won’t derail your entire project.
Step 3: Hire the Right Professionals
Unless you are an experienced DIYer tackling a small project, you will need to assemble a team of professionals. The quality of your team will directly impact the quality of the final result.
Understand the Roles
Architect/Designer: For major structural changes or complex designs, an architect is essential. An interior designer can help with space planning, material selection, and creating a cohesive look.
General Contractor (GC): A GC oversees the entire project, manages subcontractors (plumbers, electricians, etc.), sources materials, and ensures the project stays on schedule and on budget.
Subcontractors: These are the specialized tradespeople who handle specific tasks like plumbing, electrical work, tiling, and painting. If you hire a good GC, they will have a network of trusted subcontractors.
How to Find and Vet Professionals
Start by asking for referrals from friends, family, and neighbors. You can also use online platforms like Houzz or the National Association of the Remodeling Industry (NARI) to find qualified candidates. Once you have a shortlist, check their licenses, insurance, and references. Look at their portfolio to see if their work aligns with your style. Interview at least three different professionals for each role to compare their approaches, personalities, and bids.
Step 4: Develop a Detailed Plan and Timeline
With your team in place, it’s time to create the official project plan. This involves finalizing the design, selecting materials, and establishing a clear schedule.
Finalize the Design and Scope of Work
Work with your designer or architect to create detailed drawings and a comprehensive scope of work document. This document should explicitly outline every task to be completed, from demolition to the final coat of paint. Specificity is key here. For example, instead of just “install kitchen cabinets,” it should specify the brand, style, color, and hardware. A detailed scope of work minimizes misunderstandings and prevents scope creep.
Select All Materials and Finishes
Before construction begins, you should have all your materials selected, if not already ordered. This includes flooring, tile, countertops, paint colors, light fixtures, and appliances. Delays in material availability are a common cause of project setbacks. Finalizing these choices upfront helps your contractor build an accurate timeline and budget.
Create a Project Timeline
Your general contractor will lead the creation of the project schedule. This timeline should map out each phase of the renovation, from demolition and framing to plumbing rough-ins and final inspections. A typical renovation sequence looks something like this:
Permitting and approvals
Demolition and site preparation
Structural work (framing, foundation)
HVAC, electrical, and plumbing rough-ins
Insulation and drywall
Flooring and tile installation
Cabinet and countertop installation
Painting and finishing touches
Final inspections
Step 5: Manage the Project and Communicate
Once construction starts, your role shifts to project oversight and communication. Staying engaged is crucial for a smooth process.
Establish Regular Check-ins
Set up a regular communication schedule with your general contractor. This could be a daily text update or a weekly on-site meeting. These check-ins are your opportunity to ask questions, review progress, and address any issues that arise. Clear and consistent communication is the single most important factor in a successful client-contractor relationship.
Prepare for Disruption
Living through a renovation is disruptive. There will be noise, dust, and workers in your home. Plan for this by setting up a temporary kitchen, sealing off non-renovation areas with plastic sheeting, and having a plan for pets and children. If the renovation is extensive, you might consider moving out temporarily.
Document Everything
Keep a project file with copies of all contracts, change orders, invoices, and communications. Take photos of the progress regularly. This documentation is invaluable if any disputes arise. When you make a change to the original plan, always get it in writing through a formal “change order” that details the new work and any associated costs. This protects both you and the contractor.
A successful renovation is a marathon, not a sprint. By investing time in planning, you set the stage for a smoother, more predictable project. From defining your vision to managing the final details, each step builds upon the last. Embrace the process, communicate openly with your team, and soon you will be enjoying a beautifully transformed space that you helped create.
You’ve just finished your dream renovation project. The new kitchen looks amazing, the bathroom sparkles, and that home office addition feels perfect. But there’s one crucial question you need to answer: Is everything up to code?
Building codes exist to keep you and your family safe. They ensure your electrical work won’t cause fires, your plumbing won’t flood your home, and your structural changes won’t compromise your house’s integrity. Understanding how to verify code compliance after renovations isn’t just about avoiding fines – it’s about protecting your biggest investment and your loved ones.
In this guide, we’ll walk you through everything you need to know about ensuring your renovated home meets all local building requirements, from understanding permits to working with inspectors.
Understanding building codes and why they matter
Building codes are legal requirements that govern how structures must be built and renovated. These regulations cover everything from electrical wiring and plumbing systems to structural modifications and fire safety measures.
Your local building department enforces these codes to protect public safety and ensure consistent construction standards. When you ignore building codes, you risk:
Safety hazards like electrical fires, structural collapse, or gas leaks
Legal issues including fines, forced repairs, or difficulty selling your home
Insurance problems where claims might be denied for code violations
Financial losses from having to redo work or face legal penalties
Building codes vary by location, so what’s acceptable in one city might violate regulations in another. This is why checking your specific local requirements is essential.
Checking your local building code requirements
Every municipality has its own building codes, often based on national standards but with local modifications. Here’s how to research your area’s specific requirements:
Contact your local building department
Start by calling or visiting your city or county building department. Most have websites with code information and permit requirements. Ask about:
Which renovations require permits in your area
Current building code versions being enforced
Specific requirements for your type of project
Inspection schedules and procedures
Review permit applications
Even if your home renovation is complete, reviewing permit applications for similar projects can help you understand what codes apply to your work. Many building departments have sample applications online.
Consult online resources
The International Code Council provides model codes that many localities adopt. While your area might have modifications, these resources offer a good starting point for understanding general requirements.
Use code lookup tools
Some municipalities offer online code lookup tools where you can search by project type or address to find applicable regulations.
The role of permits in code compliance
Building permits serve as your official approval to perform renovation work. They also trigger the inspection process that verifies code compliance. Understanding when permits are required helps ensure your project stays legal from start to finish.
When permits are typically required
Most areas require permits for:
Electrical work including new circuits, outlets, or panel upgrades
Plumbing modifications like moving fixtures or adding bathrooms
Structural changes such as removing walls or adding rooms
HVAC installations including new systems or major modifications
Roofing work beyond minor repairs
Window and door replacements in many jurisdictions
What happens when you skip permits
Working without required permits creates several problems:
You’ll likely need to obtain permits retroactively, which often costs more
Unpermitted work might need to be torn out for inspection, then rebuilt
You could face stop-work orders if discovered during construction
Future buyers might request permits be obtained or prices reduced
Retroactive permits
If you completed work without permits, you might be able to obtain them after the fact. Contact your building department to discuss:
Whether retroactive permits are available for your project type
What documentation they’ll need to review your work
Inspection requirements for completed work
Any penalties or additional fees
Working with licensed contractors and inspectors
Professional contractors and building inspectors are your allies in ensuring code compliance. They bring expertise that helps navigate complex requirements and avoid costly mistakes.
Choosing qualified contractors
Licensed contractors understand local building codes and permit requirements. When selecting contractors:
Verify licenses through your state’s licensing board
Check insurance to ensure they carry proper coverage
Review past work and ask for references from recent projects
Confirm permit handling – experienced contractors should manage permit applications
What to expect from building inspectors
Building inspectors verify that work meets code requirements. They typically inspect projects at various stages:
Rough inspections check framing, electrical rough-in, and plumbing before walls are closed
Insulation inspections verify proper installation before drywall
Final inspections confirm completed work meets all code requirements
Inspectors aren’t there to nitpick – they’re ensuring safety and compliance. Treat them as partners in your project’s success.
Preparing for inspections
Help inspections go smoothly by:
Scheduling appropriately – don’t call for inspection until work is ready
Ensuring access to all areas that need inspection
Having permits visible and available for review
Being present to answer questions about the work performed
Common code violations and how to avoid them
Understanding frequent code violations helps you spot potential problems before they become expensive fixes.
Electrical code issues
Overloaded circuits from adding too many outlets or fixtures
Improper grounding especially in older homes getting updates
Missing GFCI protection in bathrooms, kitchens, and outdoor areas
Inadequate clearances around electrical panels and equipment
Plumbing violations
Incorrect pipe sizing for water supply or drainage
Missing permits for fixture relocations or additions
Improper venting that can cause drainage problems
Cross-connections that could contaminate drinking water
Structural concerns
Unauthorized wall removal without proper beam installation
Inadequate support for new loads or openings
Missing fire blocking in wall and ceiling cavities
Improper foundation work for additions or modifications
Scheduling and preparing for inspections
The inspection process verifies your renovation meets all applicable codes. Proper preparation helps ensure smooth inspections and quick approvals.
Understanding inspection types
Different renovation phases require specific inspections:
Foundation inspections for additions or major modifications
Rough inspections before covering up work with drywall
Mechanical inspections for HVAC, electrical, and plumbing systems
Final inspections when all work is complete
Timing your inspection requests
Schedule inspections at appropriate project stages:
Don’t rush – make sure work is truly ready for inspection
Plan ahead – inspections often require 24-48 hour notice
Coordinate trades if multiple systems need inspection simultaneously
Follow sequences – some inspections must occur before others
What happens if you fail an inspection
Failed inspections aren’t the end of the world. Here’s what to expect:
Review the report carefully to understand specific violations
Make required corrections before requesting re-inspection
Ask questions if you don’t understand the inspector’s requirements
Document fixes to show compliance during re-inspection
Consequences of non-compliance
Ignoring building codes creates risks that extend far beyond your renovation project. Understanding these consequences helps motivate proper compliance from the start.
Legal and financial penalties
Code violations can result in:
Stop-work orders that halt your project indefinitely
Daily fines that accumulate until violations are corrected
Forced removal of non-compliant work at your expense
Legal action in severe cases or repeated violations
Insurance implications
Many insurance policies exclude coverage for work that doesn’t meet building codes. This means:
Claims might be denied if non-compliant work causes damage
Coverage gaps leave you personally liable for accidents or damage
Higher premiums or policy cancellation for repeated violations
Difficulty obtaining coverage if violations are discovered
Real estate complications
Code violations can complicate future home sales:
Buyer concerns about safety and legal compliance
Price reductions to account for correction costs
Deal cancellations when violations are discovered during inspection
Legal liability if violations cause problems for new owners
Keeping proper documentation
Good record-keeping proves your renovation work meets all applicable codes. This documentation protects you legally and financially while helping future projects go more smoothly.
Essential documents to maintain
Keep these records organized and accessible:
Permits and applications showing official approval for work
Material specifications showing code-compliant products were used
Photographs of work in progress and completed stages
Organizing your renovation records
Create a filing system that includes:
Digital copies stored in cloud storage for backup
Physical files organized by project phase or trade
Easy access for inspectors, contractors, or future buyers
Clear labeling so documents can be quickly located
How long to keep records
Building code documentation should be kept:
Permanently for major structural modifications
Until the next renovation for systems that might be modified
Through the warranty period for all contractor work
For potential buyers when selling your home
Working with building authorities
Building departments want to help ensure your renovation meets code requirements. Building positive relationships with these officials makes the entire process smoother and more successful.
When to consult building officials
Contact your building department:
Before starting complex or unusual renovations
During planning to understand specific requirements
When questions arise about code interpretations
After problems to discuss resolution strategies
Making the most of official consultations
Prepare for productive meetings by:
Bringing plans or detailed descriptions of your project
Asking specific questions rather than seeking general advice
Taking notes on recommendations and requirements
Following up in writing to confirm understandings
Building positive relationships
Professional interactions help ensure:
Helpful guidance when navigating complex requirements
Reasonable interpretations of ambiguous code provisions
Faster processing of permits and inspection requests
Better outcomes when problems need resolution
Taking action to ensure compliance
Now that you understand the importance of building code compliance and how to achieve it, it’s time to take concrete steps to verify your renovation meets all requirements.
Start by contacting your local building department to discuss your specific project and any concerns about compliance. If you haven’t already obtained necessary permits, explore options for retroactive permitting. Schedule any required inspections and gather documentation of your renovation work.
Remember that building codes exist to protect you, your family, and your investment. Taking the time to ensure compliance isn’t just about avoiding penalties – it’s about creating a safe, legal, and valuable home that you can enjoy for years to come.
Your renovated home should be a source of pride and comfort, not worry and legal problems. By following proper code compliance procedures, you’re ensuring that your beautiful new spaces are also safe and legal for years to come.
Home renovations can be an exciting chapter in your life. Whether you’re giving your kitchen a modern facelift or turning your basement into the extra space you’ve always needed, the idea of transforming your home is exhilarating. However, if you’re not careful, unexpected expenses can quickly derail your budget and turn your dream project into a financial headache. Understanding these hidden costs is key to staying on track and stress-free.
Here, we’ll cover some of the most common hidden costs that homeowners face during renovations and provide actionable tips to prepare for them.
Structural Repairs That Weren’t on Your Radar
One of the most overlooked costs in any renovation project involves structural repairs. While your focus might be on adding glossy finishes or sleek appliances, underlying issues, like a weak foundation or rotting wood, can bring everything to a screeching halt.
Why This Happens:
Structural issues often aren’t visible until walls are opened or floors are pulled up. For example, you might uncover termite damage in your wood framing or cracks in your foundation that need immediate attention.
How to Prepare:
Hire a home inspector. Before beginning your renovation, invest in a professional inspection. Identifying potential red flags early can help you budget accordingly.
Allocate a buffer. Set aside 10-20% of your overall budget to cover structural repairs that may arise.
Electrical and Plumbing Updates
Older homes, in particular, are notorious for hidden electrical and plumbing issues. Outdated wiring or corroded pipes might not align with modern safety standards, forcing you to upgrade systems before proceeding with your renovation plans.
Why This Happens:
Homes built decades ago often have electrical systems designed for far fewer appliances and gadgets. Similarly, plumbing systems may degrade over time, leading to leaks or clogs that must be addressed during remodeling activities.
How to Prepare:
Conduct pre-renovation assessments. Have licensed electricians and plumbers evaluate your home before starting construction.
Prioritize improvements. If updating your wiring or plumbing aligns with safety codes, consider these changes a vital investment, even if they increase your upfront costs.
Permit Fees
Many homeowners are surprised to learn that permits are often required for renovation projects. Whether you’re adding extra square footage, reconfiguring walls, or upgrading mechanical systems, failing to secure the correct permits can result in fines or delays.
Why This Happens:
Permit requirements vary by location, and they’re often overlooked by first-timers or DIY enthusiasts. Not having a permit can halt construction or lead to costly penalties when selling your home in the future.
How to Prepare:
Research local regulations. Check with your city or county to understand which projects require permits.
Account for fees. Factor permit costs into your budget upfront; they could range from a few hundred to several thousand dollars, depending on the scope of work.
Material Price Changes
Material costs are one of the most volatile aspects of any renovation project. Lumber, steel, tiles, and even paint can vary in price due to supply chain issues, natural disasters, or economic conditions.
Why This Happens:
Unforeseen events, like a global pandemic or regional shortage, can drive up prices unexpectedly, leaving you scrambling to adjust your budget.
How to Prepare:
Lock in prices early. Work with your contractor to purchase materials as soon as possible to secure current rates.
Be flexible. Have alternative options in mind for finishes or materials in case prices balloon beyond your budget.
Demolition Surprises
Tearing down walls or ripping out flooring can sometimes reveal hidden issues like asbestos, mold, or even pest infestations.
Why This Happens:
Older homes, especially those built before the 1980s, may contain hazardous materials that require specialized—and costly—removal processes.
How to Prepare:
Know your home’s history. If your home is older, research construction trends from that era and speak with contractors about potential risks.
Test for hazardous materials. Run professional tests for asbestos or lead paint in areas slated for demolition.
Adjusting the Scope of the Renovation
It’s not uncommon for homeowners to discover halfway through a project that they want to change their plans. Maybe you decide to go for higher-end countertops or expand your renovation to include additional rooms. While these changes may enhance the final result, they also inflate costs.
Why This Happens:
Renovation projects evolve as homeowners see the work progress and realize new possibilities or requirements.
How to Prepare:
Stick to your plan. Avoid making changes unless absolutely necessary to control expenses.
Plan thoroughly. Spend extra time upfront reviewing all aspects of your renovation project to avoid second-guessing yourself mid-way.
Tips to Stay Ahead of Hidden Costs
Staying proactive can make a world of difference when it comes to unexpected expenses. Here are some additional tips to ensure your renovation stays within budget:
Consult professionals early. Architects, designers, and contractors can help identify potential pitfalls before construction begins.
Get detailed estimates. Ask your contractor for itemized quotes that break down labor, materials, and other costs. This transparency will help you identify areas where spending might increase.
Plan for contingencies. Experts recommend setting aside a contingency fund of 10-20% to account for surprises.
Communicate clearly. Regular check-ins with your contractor can help you stay informed and minimize unexpected changes or delays.
Think long-term. While some repairs or updates may seem expensive now, consider their value in boosting your property’s safety, efficiency, and resale value.
Hidden costs in home renovations are more than just an inconvenience – they can derail your timeline, budget, and overall vision for your space. By understanding potential pitfalls and preparing for them, you can avoid unpleasant surprises and keep your project on track.
Start by assessing your home’s current state, consulting with professionals, and setting a realistic budget (including a buffer for the unexpected). With thoughtful planning and the right approach, your home renovation can become the stress-free, rewarding experience it’s meant to be.
When it comes to selling your home, first impressions matter. But what if you could not only impress potential buyers but also increase your property’s market value? The solution lies in making smart, high-impact renovations that appeal to today’s discerning homebuyers.
Whether you’re planning to sell soon or making updates in preparation for the future, this blog will help you pinpoint the most valuable home improvements to focus on. From revamping your kitchen to enhancing your home’s curb appeal, we’ll show you how these upgrades can maximize your return on investment (ROI). Plus, we’ll include tips to ensure your renovations are budget-friendly and eco-conscious.
If you’re a homeowner searching for ways to increase resale value or looking for a renovation company in Vancouver, this guide is for you.
Why Focus on Home Renovations Before Selling?
Investing in home improvements isn’t just about making your home look great; it’s also about getting the best possible price at resale. Buyers want homes that feel “move-in ready” without requiring additional work. With the right updates, you can meet buyer expectations while standing out in a competitive market.
According to the National Association of Realtors, certain upgrades offer a substantial ROI. That means you can often recoup a significant portion of your renovation costs when selling. Let’s look at which home improvements are proven to deliver the best bang for your buck.
1. Kitchen Renovations Are Worth Every Penny
The kitchen is often referred to as the heart of the home, and buyers agree. Studies show that kitchen upgrades can recoup up to 60-80% of their cost, making it one of the most valuable home improvements you can make.
What to Focus On:
Cabinets and Countertops: Replace outdated cabinets or simply reface them for a cost-effective refresh. Update countertops with durable materials like quartz or granite for a polished look.
Modern Appliances: Stainless steel appliances are a favorite among buyers. Consider energy-efficient models for an eco-friendly edge.
Lighting: Swap out old fixtures for modern pendants or LED under-cabinet lighting to brighten the space.
Pro Tip: Keep it neutral. A simple, clean design has broader appeal and increases the likelihood that buyers will envision themselves in the space.
2. Bathroom Remodels Add Luxury for Less
A chic, functional bathroom is a strong selling point. Buyers want a spa-like experience at home, and even small changes can make a big impact.
Budget-Friendly Upgrades:
New Fixtures: Replace faucets, showerheads, and drawer pulls for an instant refresh.
Tile Updates: Retile the floor or shower with neutral, modern designs that appeal to a wide audience.
Double Vanity: If space allows, a double vanity is a buyer favorite and can enhance functionality.
Adding value doesn’t have to mean gutting your entire bathroom. Small investments like modern lighting or even painting the vanity can bring in noticeable returns.
3. Revamp Flooring for an Instant Impact
Worn carpets or outdated linoleum can turn off potential buyers. Flooring is one of the first things they notice, so replacing it can set the tone for your home.
Buyer-Approved Options:
Hardwood Flooring: Classic, durable, and universally loved, hardwood can deliver over 75% ROI.
Luxury Vinyl Plank (LVP): Affordable and waterproof, LVP has become a popular alternative for bathrooms and kitchens.
Carpet Replacement: If carpeting is necessary (such as in bedrooms), make sure it’s new, clean, and in neutral tones.
Pro Tip: If hardwood isn’t in your budget, consider laminate or engineered wood for similar appeal at a lower cost.
4. Enhance Curb Appeal to Create a Great First Impression
Everyone knows the importance of a warm welcome. Your home’s exterior is the first thing buyers see, and making it inviting can boost your resale value.
Curb Appeal Boosters:
Fresh Paint: A new coat of exterior paint can make your home look brand new. Opt for neutral shades combined with a bold front door color for a modern touch.
Landscaping: Trim bushes, plant flowers, and ensure the lawn is green and trimmed. Low-maintenance landscaping is especially attractive to buyers.
Lighting: Add outdoor lighting to highlight pathways and entryways for a warm, welcoming effect.
Pro Tip: Don’t forget the roof! A clean or recently replaced roof can eliminate buyer concerns and add instant value.
5. Green Upgrades That Appeal to Modern Buyers
Today’s buyers care about sustainability and energy efficiency. Integrating eco-friendly home improvements can appeal to environmentally conscious buyers while reducing long-term utility costs.
Smart Green Upgrades:
Windows and Insulation: Energy-efficient windows and proper insulation can dramatically reduce heating and cooling costs.
Solar Panels: Installing solar panels can be a big draw, especially in eco-friendly markets.
Smart Home Features: Smart thermostats, lighting, and security systems add convenience and energy-saving potential.
Not only are these upgrades attractive to buyers, but they also often come with tax incentives or rebates.
The Role of a Renovation Company
No matter where you are in your remodeling process, partnering with a reliable renovation company can ensure your updates are high-quality and aligned with market trends. Experienced renovators can guide you through everything from material selection to finishing touches, maximizing your investment while minimizing your stress.
At Canadoo Enterprises, we specialize in creating cost-effective, eco-friendly home renovations that add value and market appeal. Whether you’re updating a single room or revamping your entire home, we’re here to help.
Start Small, Dream Big
Home improvements don’t have to break the bank. Strategic, high-value updates can make your home more desirable to buyers and help you achieve a higher selling price. Whether it’s a modern kitchen, a fresh coat of paint, or energy-efficient upgrades, these changes can also elevate your own living experience while you prepare to sell.
Need help figuring out which updates are right for your home? Contact a trusted renovation company in Vancouver Canadoo Enterprises to transform your property into one buyers can’t resist.
We use cookies to ensure that we give you the best experience on our website. If you continue to use this site we will assume that you are happy with it.Ok